The Video Processing System, Part 2
In our last article, we began to create our processing system by putting the essential structure in place and adding our input handling stage. In this installment we are going to be adding a gaussian blur and color tweaking controls to our patch.
Download the patch used in this tutorial.
Download all the patches in the series updated for Max 7. Note: Some of the features in this system rely on the QuickTime engine. Using AVF or VIDDLL video engines will not support all functions. On both engines you may see errors related to loadram or have limited access to file record features.
Tutorials in this series:
Softening the Edges
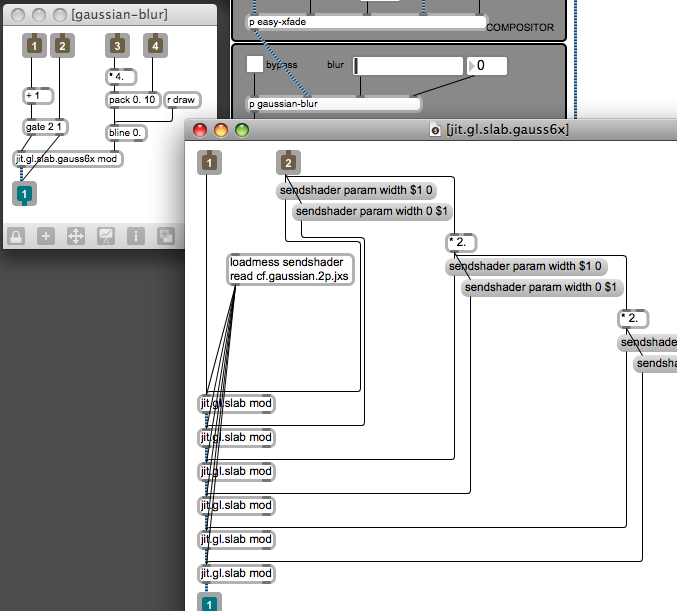
A dynamic blur is very useful in creating dramatic effects, especially when combined with color processing. A subtle blur can go a long way towards hiding some of the noise and imperfections of your image, and a more extreme blur can reduce a complex image to soft shapes of modulated color. Luckily, to create our blur module, we don't have to travel much further than the Jitter examples folder. There is a little abstraction in this folder called "jit.gl.slab.gauss6x" that cascades several jit.gl.slab objects loaded with a gaussian blur shader. By combining several passes of the shader, this abstraction creates a nice smooth blur even at fairly large amounts.

Instead of reinventing the wheel, we'll just drop that abstraction into our patch and make a slider to control it. Once again, we'll use the bline object to smooth out parameter changes, allowing us to easily perform smooth, cinematic focus effects.
Striking a Balance
The next stage we'll add to our video processor is a color balance control. This will allow us to adjust the scale of our red, green, and blue channels . This is very useful for fixing color on an imbalanced video input, often much easier than mucking around with the camera settings. Color control is also a great way to create a specific look or mood for your video.
To create this module, we simply pull out the "cc.scalebias.jxs" shader and load it into a jit.gl.slab object. We then add a slider for each color channel and scale the values to get them into a usable range. By giving them a greater range than 0.-1., we provide the ability to blow up the colors for more extreme color effects.
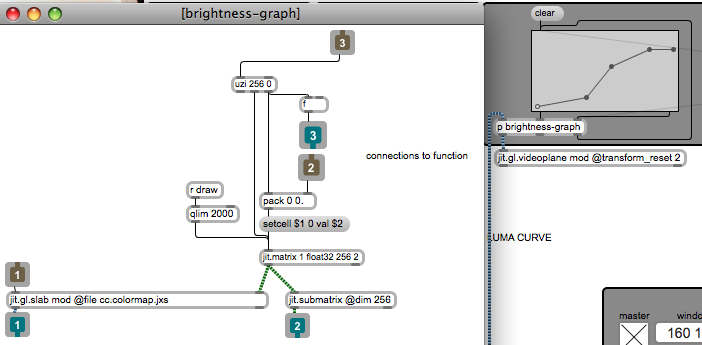
The next module we'll add is a luminance curve using the "cc.colormap.jxs" shader and a simple interface using the function object. The "colormap" shader works very similarly to the jit.charmap, so porting old patches based on jit.charmap to work with GPU-processing is pretty simple. In this case, we are using a single curve to remap all of the color channels equally, which has the same effect as using the "Curves" plugin in After Effects or Photoshop.

The interface between the function object and jit.fill is an old trick I had used in a patch a long time ago, so I didn't have to do much to get it running. This module gives us subtle control over contrast and the distribution of luminosity. Creative misuse of the module can also generate some interesting results, especially when combined with the blur.
Moving Forward
You may be noticing a pattern here by now - each module we've made so far is little more than a jit.gl.slab object with a simple interface for the parameters of the hosted shader. This simple way of creating modules will get you pretty far, and given the number of useful shaders that ship with Jitter, you could create a lot of modules with a minimum of effort. In the examples/jitter-examples/render folder is a folder called "slab-helpers". These are a bunch of simple patches designed to demonstrate each of the included shaders (similar to a help patch), and can be copy/pasted into a module for almost effortless development.
In our next installment, we'll look at ways to complicate things by adding a composited delay line and a simple feedback effect.

by Andrew Benson on February 17, 2009

