Jitter Recipes: Book 3, Recipes 26-43
In third installment of Jitter Recipe Collection, there are more snacks for the Patching Enthusiast! This Jitter Recipe "AnaglyphRender" builds on the "RenderMaster" recipe posted recently to create a realtime 3-D anaglyph image.
Recipe 26: VideoSynth3

General Principles
Performing transformations on a 3D matrix
Generating video-synthesis with audio signals
Colorizing a grayscale video
Commentary
The mechanics of this patch are very similar to the RagingSwirl patch, applied to video processing instead of OpenGL geometry. In this example, we are actually distorting and manipulating a 3D matrix, but only viewing one slice of it. The jit.charmap is used to turn our 1-plane matrix into a full color image.
Ingredients
jit.rota
jit.poke~
jit.matrix
jit.charmap
jit.noise
jit.dimmap
Technique
Using the "bot" subpatch, our matrix is continuously drawn into with the jit.poke~ object.
This is then rotated across 2 different dimensions using a combination of jit.dimmap and jit.rota (see RagingSwirl).
Next, we take one 2D slice of the larger matrix for display using the "srcdim" messages.
This is then converted to a 4-plane matrix and colorized using jit.charmap. By using an upsampled color map, we are able to constrain the palette, and decide between a smooth, cloudy look or a flat, hard-edged look.
Recipe 27: Debris
General Principles
Using the alpha channel to do complex blending effects
Analyzing movement between frames
Using feedback to maintain continuity.
Commentary
This demonstrates a way to generate an alpha-channel based on an analysis of the video. Here we use the amount of movement (difference) between consecutive frames, and then impose a threshold to decide what pixels will be visible. The effect resembles that of a degraded digital video signal, and can be used to generate all sorts of pixel debris.
Ingredients
jit.qt.grab
jit.rgb2luma
jit.unpack
jit.pack
jit.matrix
jit.op
random
Technique
The most important aspect of the processing is the generation of an alpha mask. To do this we first convert our video stream to grayscale using jit.rgb2luma.
The matrix is then downsampled using random "dim" messages, generated by the random object.
This is then compared to the previous frame using jit.op @op absdiff to get the absolute difference between the two. Note that we are taking advantage of the trigger object to perform this slight of hand.
Once we have generated our difference map, we then use jit.op @op > to create a threshold. This means that it will turn on any pixel that has changed more than the threshold. This will then serve as our alpha mask, but passing it into the first inlet of the jit.pack object.
Once our alpha channel has been packed in with our live feed, this is then blended with our current image using jit.alphablend. The resulting image is then fed back to be blended with the next frame using a named matrix.
Recipe 28: SubTitle
General Principles
Adding text to live video display
Converting text to matrix format
Imposing a specific rendering order
Commentary
I get a lot of questions about dealing with text in video patches. Whether you are using text as labels, titles, or subtitles, you will generally want it to be in the foreground. In order to do this successfully, while maintaining the transparency of the jit.gl.text2d's bounding box, you must impose a drawing order.
Ingredients
jit.gl.videoplane
jit.str.fromsymbol
jit.textfile
jit.gl.text2d
Technique
The key thing to this patch is maintaining the render order. To do this, we turn the @automatic off for all of our gl.objects, and then use the trigger object to bang them in sequence.
Using the jit.str.fromsymbol object, we route the text output from the textfield and convert it to a jitter matrix for rendering single-line text.
The jit.textfile object is very useful for dealing with formatted text. Simply double-click the object to bring up a text editing window.
By turning on @blend_enable for the jit.gl.text2d object, we make sure that only the text itself is displayed.
To generate the shadowed text, we actually render the text twice - once in black, and then offset in white.
Recipe 29: Stutters
General Principles
Generating timing effects with frame messages
Quicktime movie playback and looping
Commentary
This example is a simple patch that demonstrates a way to generate looping effects with jit.qt.movie. This is very useful for those who are interested in working with looping videos, and creating realtime editing patches. With a little tweaking, this patch could serve as the basis for more complex playback procedures.
Ingredients
jit.qt.movie
accum
jit.window
Technique
First, we need to set jit.qt.movie's autostart attribute to be off, to prevent it from playing back the movie file automatically.
The key to understanding this patch is the use of the accum (as a counter) along with the modulo (%) operator. This allows us to count loops.
One tricky bit is the use of the route object to obtain the framecount of each movie loaded into the jit.qt.movie object. This sets the modulo size of the entire movie, which makes sure that we always send frame numbers that are within the range of actual frames in the movie.
When the stutter toggle is turned on, a shorter loop of numbers is generated that is added to the current frame number.
These numbers are then sent to jit.qt.movie using the "frame" message.
Recipe 30: SoundLump
General Principles
Using audio input to generate geometry
Using an environment map to create reflective surfaces
Using matrix feedback to generate motion
Using geometrical expressions to create shapes
Commentary
This patch takes an audio signal and generates a cascading, lumpy surface. Using some simple expressions, this surface is then distorted to create a pregnant lump. Environment mapping creates a liquid-like reflective surface.
Ingredients
jit.catch~
jit.gl.mesh
jit.matrix
jit.dimmap
jit.gl.texture
jit.qt.grab
jit.expr
Technique
We take the vector of audio grabbed by jit.catch~ and render it to a single row of a matrix. This matrix is then stretched down slightly and fedback. This generates the cascading effect.
We then flip the matrix using jit.dimmap and use jit.expr to create the coordinates of our OpenGL shape.
By taking the sin of the x and y coordinates, we generate a rounded lump across the z-coordinates.
Once we have generated our figure using jit.gl.mesh, we use @tex_map 3 to apply our texture as an environment map. Lighting is enabled by turning on @auto_normals and @lighting_enable.
Our texture is generated using a similar technique to that used with our sound vector.
Recipe 31: Animator
General Principles
Using the system clock for solid animation timing
Animating parameters using breakpoints and pattr-family objects
Commentary
This example shows a good way to generate stable timing for automation parameters, despite the fluctuating framerates common to Jitter. By using the CPU clock, we ensure that the flow of the animation is steady regardless of framerate. It also shows a simple way to use autopattr and pattrstorage to manage many parameters at once.
Ingredients
cpuclock
jit.gl.mesh
autopattr
pattrstorage
function
Technique
In order for autopattr to see our UI elements, we'll need to name each of these objects. To do this, we simply select the object and hit Command+' (mac) or Control+'(windows) and enter a name into the field.
Once we have set up our named UI objects, we can then store presets using the pattrstorage objects.
Because cpuclock counts the number of milliseconds since Max was opened, we will need to constrain the range of this output to be useful for us. To do this, we use a modulo (%) operator. The output is then fed into the function object, which outputs the value at that x-location of the curve.
This patch utilizes the handy interpolation function of pattrstorage, which allows you to recall in-between states by sending floating-point values.
This same technique could be applied to any number of parameters for any number of OpenGL or other Jitter objects for a complex animation setup.
Recipe 32: Hold Still
General Principles
Using frame-differencing to detect movement
Using video sensing to control sound synthesis
Commentary
One of the most straightforward ways to do video sensing with Jitter is to perform frame-differencing, which gives you a reading of the amount of movement. Using a couple of basic Jitter objects, we can map the amount of motion in a scene to a variety of synthesis parameters.
Ingredients
jit.qt.grab
jit.op
jit.rgb2luma
jit.slide
jit.3m
Technique
First, we convert our video stream to single-plane using jit.rgb2luma. We do this for simplicity. You could also try performing these calculations with all of the individual color channels for more complexity.
To get the difference between consecutive frames, we use jit.op @op absdiff. This will show us the amount of movement between frames. We then use a jit.op to do apply a threshold. This will give us a binary image.
This image is then fed through jit.slide to remove flickering and smooth out the data flow.
The jit.3m gives the mean value of all of the cells in a matrix. If you remember your arithmetic, you will know that the mean is derived by adding all elements together and then dividing by the number of elements. We take the inverse approach to calculate the total number of white pixels in our image.
This is done by first multiplying the mean output by 327,200, which is the total number of pixels in a 640x480 matrix. Since the value of white in char data is 255, we must then divide by 255 to get the number of white pixels.
Once we have this number calculated, we can use it to drive the synthesis parameters of our audio stage.
Recipe 33: Fast Cuts
General Principles
Loading a media folder for easy switching
Creating automated real-time editing
Tempo Sync
Commentary
This basic example provides the basic structure for creating a dynamic movie-clip playing VJ-style patch. In addition to providing a UI for media management, it also shows a simple way to tap out a sync tempo for timed changes. Add some compositing effects and you'll be ready for the clubs.
Ingredients
ubumenu
dropfile
jit.qt.movie
sync~
Technique
First, we'll start with our file loading mechanism. For convenience, we are using the dropfile object, which allows us to simply drop a folder with our media files, and it kindly outputs the file path for us to use elsewhere.
In order for the file path to have any effect, we have turned on the "autopopulate" attribute of our ubumenu. Now, if we send a "prefix ..." message to ubumenu, it will automatically load the names of our files for later use.
One tricky thing we are doing is to use the dump output of ubumenu to give us the number of items we've populated it with and use that to set the range of our random object.
A similar trick is used to get the number of frames in each movie. Inside the "pick_a_start_frame" subpatch, you will see that everytime we read a clip, the "getframecount" message is triggered. This causes the jit.qt.movie object to report the number of frames, which is then used to set the range of a random object. All these messages are sent to the proper place by using the route object. This is how we get each movie to start at a random point in the clip.
For our tempo-sync module, we use the beat-following feature of the sync~ object. This tracks the interval between bangs and reports the BPM as well as generating a signal ramp and midiclock tick. We use the midiclock output to drive our fast cuts. Since midiclock counts 24 ticks for every beat, we use a counter->select combo to slow things down a bit.
Recipe 34: Alpha Toast
General Principles
Video Compositing
Generating an Alpha Channel for blending
Using Video Input
Commentary
This patch is an homage to the first generation Video Toaster, which featured a number of snazzy transitional animations. For some reason, all I can remember now is the tennis player and the star wipe. AlphaToast uses the luminance of our live video input to generate an alpha channel for blending two movie sources. The results of this can be surprisingly complex and interesting.
Ingredients
jit.alphablend
jit.rgb2luma
jit.qt.movie
jit.qt.grab
jit.unpack,jit.pack
Technique
To generate our alpha channel, we convert the output of jit.qt.grab to black/white by using the jit.rgb2luma object.
This 1-plane matrix is then scaled and offset using the jit.op object before packing it into the first plane of our jit.qt.movie output. This effectively gives our movie an alpha channel to use for blending.
The 2 video sources are then sent to jit.alphablend to be combined together. Try looking around for some hi contrast objects to play with. A flashlight can be quite useful for creating blending effects.
Recipe 35: Paramination
General Principles
Using a matrix to store control data
Interpolating control presets using common Jitter objects
Using Jitter to control audio synthesis
Commentary
Managing control data can easily become a pet obsession for Max-users, especially once they've tackled the big obstacles of understanding digital audio and video processing. While there are a number of handy pattr-family objects to manage presets and such, I wanted to explore a different way of managing and interpolating presets using the Jitter matrix. One of the great benefits of this approach is being able to take advantage of all of the great generators and manipulators of data at your disposal. It is also a very efficient way of generating random parameters. This patch demonstrates the basic mechanics required to make this happen.
Ingredients
jit.matrix
jit.submatrix
jit.fill
jit.slide
jit.iter
jit.dimmap
jit.noise
Technique
The list output of the multislider is converted to a matrix column using jit.fill. This column represents a single preset.
By using the "dstdim" messages to jit.matrix, we place each stored preset in a column of the matrix called "setbank". This creates our bank of presets that will be used by our playback section on the right.
To access a specific preset-column, we use jit.submatrix, and use the offset attribute to define which column we will use.
The jit.dimmap converts the vertical column to a horizontal row. This is purely for visual feedback and offers no functional advantage.
The output is then sent to jit.slide, which performs temporal interpolation. This gives the effect of our presets slowly changing over time.
This preset matrix is then split up into individual values using jit.iter. Since jit.iter gives the cell-coordinate from its center outlet, this can be used as the index for each cell value. By packing the value and index into a list (and then reversing that list), it is now in a format that is easily managed by route.
Each cell value is sent to the appropriate output of route, and then used to drive the parameters of a synthesis engine.
Try using jit.bfg instead of jit.noise to generate randomness, or jit.xfade (or any compositing effect) to transition between different presets.
Recipe 36: TinyVideo
General Principles
Using jit.expr to generate geometry data
Performing texture animation
Making animated sprites
Using jit.op to do iterative process loops
Commentary
This recipe shows how to load a single texture with a bunch of frames, and then use texture coordinates to animate the texture. This in itself is a pretty handy technique, but I decided to add a bit of extra spice by also including a way to independently animate 100 textured-quads using only one texture and one OpenGL object.
Ingredients
jit.expr
jit.op
jit.gl.texture
jit.gl.mesh
jit.matrix
Technique
We first need to collect some frames into our texture to be animated. In this case, we use jit.qt.grab, but any video source can be substituted here. This is done by sending srcdim messages to a jit.matrix object, which is big enough to fit 100 frames of 160x120 video.
Now that we have a jit.gl.texture with 100 frames of video loaded into it, we need to come up with some geometry to throw it onto. In this case, we'll be using jit.expr to create a bunch of quads, or 4-point shapes to texture. You'll find the magic inside the the gen_quads subpatch.
You may have noticed that the jit.matrix objects in here are 40x10 rather than 10x10. This we have done in order to make room for the 4 vertices that make up each quad. You may also note that we have switched to a 5-plane matrix. This is so that we can make use of the texture coordinates that we'll be generating later.
To generate the quad geometry, we use jit.expr to fill a matrix using an expression that loops over 4 cells horizontally. This expression creates a rectangular set of points, and sets generic texture coordinates for each point. This filled matrix is then added to our input matrix to create a quad at each location defined in the input.
So far we've got a whole bunch of quads and a single texture, which is probably not very interesting. To get this thing moving, we need to create a way to loop the texture coordinates in a way that scrubs through our grid of frames in the texture. Have a look inside the animate_frames patch. The method we've used here makes use of modulo-arithmetic to loop the values in a 10x10 matrix from 0-99. The rest of these operations make sure that this value is associated with the appropriate coordinates.
By using a named matrix, we're able to create a feedback loop with our animation process, which iterates once per frame.
Once we've got all of this, our position and texcoord matrices are packed together and added to our generated geometry matrix. From there, it is off to jit.gl.mesh @draw_mode quads to be rendered.
For more fun, try using different methods of filling the position matrix, or using video sources with an alpha channel for some blending effects.
Recipe 37: Shatter
General Principles
Using OpenGL for Motion Graphics effects
Particle-esque animation
Using bline for motion curves
Commentary
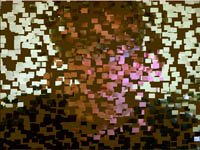
Similar in structure and basic design to the TinyVideo patch, this patch uses the textured quad approach to create a nice motion graphics effect where the video image appears to break up into a bunch of little pieces.
Ingredients
jit.expr
jit.gl.mesh
jit.gl.texture
bline
Technique
This patch takes several techniques developed in previous recipes, such as the particle animation technique first introduced in Particle Rave-a-delic and the procedural generation of textured quads using jit.expr from TinyVideo. By combining these techniques with controls for velocity and an "amount" curve, we create a very different sort of effect. The displacement matrix gets multiplied by the output of bline to provide timed control of the motion.
Recipe 38: BrightLights
General Principles
Using OpenGL for Motion Graphics effects
Using Video Input to control OpenGL effects
Commentary
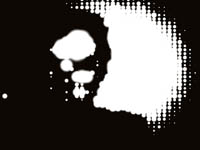
This patch uses the underlying architecture of Recipe 36, but adds in the use of a matrix input to scale the sprites, creating an effect much like a grid of lights that display the incoming video. The same luminance input that is used to scale each of the sprites can also be utilized to scale other effects such as moving each sprite around with noise. The shader included with this patch creates a feathered, circular alpha-mask for the incoming texture. You may notice that this is the first recipe to include it's own shader!
Ingredients
jit.expr
jit.gl.mesh
jit.gl.texture
jit.gl.slab
jit.rgb2luma
jit.op
Technique
Here we are seeing yet another iteration of the quad-drawing expression used in previous recipes, but this time it is used for a very different effect. There are two aspects of the patch that make it work.
First, we calculate the luminance of the incoming video so that we can use that to scale our sprites. This luminance image is then downsampled because we are prioritizing the effect over video clarity, and also so that our drawing code is more efficient. This is then scaled, biased, and thresholded to give more selective control over the lights. Using a high multiplier with a higher threshold value will produce a more extreme scaling effect. This matrix is then multiplied with the output of our quad-drawing expression (jit.expr) to scale the individual sprites.
To make the light look nice and luminous, we create a big white texture that is fed through the "ab.spotmask.jxs" shader to create a circular alpha mask. This makes each sprite appear to be a bright, soft-edged light. For more of a gradual fade, the "param fade" value can be increased. Location of the spotmask can also be used to create offset effects.
Note: the included shader works just as well with video or image textures if you need to do feathered, circular masking of an image.
Recipe 39: Preview
General Principles
Making a preview window for OpenGL scenes.
Using shared textures
OpenGL texture readback
Commentary
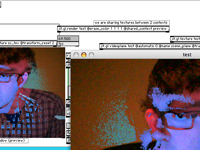
Until recently, making a preview window for OpenGL scenes was a pretty messy and difficult task, and usually involved doing all of your rendering multiple times in different contexts. Now, with texture capturing and sharing available in recent versions of Jitter, it is much easier to patch together a preview display. This recipe also demonstrates one of my favorite new techniques (and one you're bound to see in future recipes), which is to manage rendering order using the "layer" attribute and jit.gl.sketch's "drawobject" message.
Ingredients
jit.gl.videoplane
jit.gl.sketch
jit.gl.texture
jit.gl.slab
jit.gl.render
Technique
The camera grabbing and image processing should be familiar from other patches. the included shader, "ab.lumagate.jxs", is a slightly more developed version of the shader written for the "My First Shader" article.
Note that the jit.gl.videoplane objects are set to "@automatic 0" but there is nothing banging those objects. How is this done? To see the answer, have a look inside the "render_master" subpatch. You will notice that the first jit.gl.sketch object has "@layer 1" and "@capture sc_tex". This means that it will be the first OpenGL object rendered, and that the output of this object will be captured directly to a texture (sc_tex) instead of being drawn to screen. The "drawobject xxx" message is used to draw our two videoplanes to the capture texture.
You might have noticed that there was a jit.gl.videoplane object in the main patch (scene_plane) that is using "@texture sc_tex". This is used to display our captured scene directly to our OpenGL context. This is done using the second jit.gl.sketch object with "@layer 2", which tells it to render after the first jit.gl.sketch object. This way we can be sure that there is something in our "sc_tex" texture before we try to display it.
To share the captured texture with our "preview" context, we need to set the "shared_context" attribute. From there it is as simple as setting up a named jit.pwindow and drawing a mapped videoplane into it.
Recipe 40: SceneWarp
General Principles
Video feedback using OpenGL
Using jit.gl.sketch to manage rendering
OpenGL texture readback
Commentary
We've had several recipes already that do OpenGL feedback, so you may be wondering what prompted me to put up another one. Well, first of all, I wanted to give an example of the most efficient and reliable way to do texture readback in Jitter, and I also wanted to show you a simple warping technique using jit.gl.mesh to display the feedback texture. This recipe makes good use of the technique presented in the last recipe, where jit.gl.sketch is used to render individual objects, with the "layer" attribute defining a specific rendering order. This provides a pretty elegant and spaghetti-free way to do some more complex rendering operations.
Ingredients
jit.gl.videoplane
jit.gl.sketch
jit.gl.texture
jit.gl.slab
jit.gl.mesh
Technique
Most of the mechanics of this patch should be familiar from Recipe 39, with the exception of the feedback stage and the use of jit.gl.mesh to distort the feedback image.
First off, you will notice that we are using two textures in the capture/feedback chain, "sc_tex" and "fb_tex". Your first impulse might be to capture directly to one texture and then use that for feedback, but this will most likely just cause pixel trash. In order for this to work, you need to capture your scene (fb_plane,ol_plane) to a texture (sc_tex), and then map that texture to a videoplane (sc_plane). This videoplane is then captured to our feedback texture (fb_tex) using the second jit.gl.sketch and then displayed to screen using the third jit.gl.sketch.
The order that all this is happening is defined using the "layer" attribute of the corresponding jit.gl.sketch objects.
Once we have our feedback texture, it would be pretty boring just to display it untouched behind our overlay texture. To prevent boredom from dragging us all into a deep slumber, we apply our feedback texture to a slightly distorted plane (jit.gl.mesh). Over the course of several frames this subtle distortion creates a swirly and dramatic effect. Further processing can be done by adding a jit.gl.slab into the processing chain.
By itself, this recipe is pretty nice, but with a little seasoning and your own personal touches, it can be a mind-melter of psychedelic swirly visuals. Bon Apetit!
Recipe 41: Verlets
General Principles
Generating a custom particle physics engine
Using convolution and matrix operations to perform calculations.
Converting procedural techniques to a Jitter patch
Commentary
Hand-rolled particle systems are a bit of a fixture in the Jitter Recipes, so when I read recently about Verlet Integration, I immediately wondered how difficult it would be to use this particle physics technique inside of Jitter. Using different constraints within the calculation loop allows you to simulate things like fabric and ragdoll physics with little effort.
Ingredients
jit.convolve
jit.op
jit.matrix
jit.expr
jit.gl.render
jit.gl.mesh
Technique
Before spending too much time trying to figure out this patch, it will help to familiarize yourself with the theory behind Verlet Integration. There is a pretty good tutorial here.
Since we are doing calculations on a single matrix over time, we start by setting up a feedback loop where the named matrix is at the top and bottom of the calculations. We also need to compare our current frame with the previous one to derive the velocity information. For this purpose, we use another jit.matrix with @thru 0 to store the frame. To do our basic position calculation, we use jit.expr.
Now, if we were to leave it with that, we'd have a pretty boring particle system. Where Verlet Integration really shines is when you start applying "constraints" to your system. In the patch, we have two very similar subpatches called "constraints". These two patches compare the location of each particle to that of it's nearest neighbors. If the particle is outside of the preferred distance, it attempts to correct the position of the chosen particle as well as its neighbor. To do these operations, we use jit.convolve to shift the matrix by one cell in either direction. Once it is shifted, we can do a 3D distance calculation to find the current distance and try to bring it closer to the ideal. All of the equations are directly taken from the article referred to above.
Once we have corrected position for the right neighbor and the below neighbor, we then take the average of those corrections and pass it to the "gravity" stage. If we wanted a more perfect distance correction, we could create another pass, but for this recipe, I decided to stick with one.
The gravity stage simply reduces the Y-value of all the cells by a specified amount each frame and then performs a folding operation to keep all the particles bouncing around in a constrained area.
Once we have done all this math, we send the matrix off to be rendered using jit.gl.mesh and send the results back to the top of the processing chain again to calculate the next frame.
Now that we have the physics engine built, we can proceed to set it in motion by repositioning different particles. Notice that all the particles start moving once you've repositioned one of them. This is because the "constraints" system is trying to maintain a specified distance between each particle. Try experimenting with different sorts of constraints, different calculations, or different ways to trigger movement.
Recipe 42: RenderMaster
General Principles
Using jit.gl.sketch to manage complex rendering processes
Capturing 3D scene to a texture
Post-processing a 3D scene using jit.gl.slab
Commentary
Early on in the Jitter Recipes, I posted a patch called SceneProcess which took a 3D scene and processed it through jit.gl.slab and feedback. In the process of working on some recent video projects, I needed a lightweight and modular system for creating quick 3D sketches that could be combined together to create different scenes. Rather than creating a whole rendering context for each patch, I needed a master patch that did everything itself. Further, for the work I was doing, the 3D scenes would often require some post-processing to sweeten them up, like color correction and blur effects. Having this framework freed me up to make some very complex setups very quickly, and reuse parts for a variety of scenarios.
Ingredients
jit.gl.sketch
jit.gl.texture
jit.gl.render
textedit
text
Technique
The core of how this patch functions is inside the "object_register" subpatch. The top portion of the abstraction provides an interface that converts object names typed into the textedit object on the main screen into "drawobject" messages to jit.gl.sketch. As we've seen in previous recipes, you can use jit.gl.sketch in this manner to draw various OpenGL objects in a controlled manner.
Another little detail in this abstraction is the messages "glalphafunc greater 0.5,glenable alpha_test." These OpenGL messages enable what's called alpha testing, which will check the value of the alpha channel and simply not draw the pixel if the alpha is less than 0.5. This is useful for scenes where you want to use depth-testing, but still want to have transparency with the texturing.
Inside the "post-process" subpatch you will find the texture that we're capturing the scene to. You will notice the messages "capture_depthbits 16,capture_source color, dim 1280 720." These messages set our texture up to enable a 16-bit depthbuffer, which allows for depth-testing in our 3D scene. If you don't specify a "capture_depthbits" value, depth-testing won't happen in your captured scene. From there, we pass the texture through a simple bloom filter and on to our output videoplane.
If you load the "42.RenderMaster" patch and then also load the "simple_test" patch, you will notice that the textedit in the main patch gets automatically updated with the names of the OpenGL objects in "simple_test." This is because we've added in a very simple interface whereby the objects identify themselves using a loadbang and "getname" message. This is all sent along to the textedit object where it gets added to the list of rendered elements.
Using the simple framework here, multiple OpenGL modules can be built and added to a scene as needed. The post-processing chain can also be developed more to create other image effects, and get away from the sharp edges of your typical OpenGL scene.
Recipe 43: Anaglyph Render
General Principles
Using jit.gl.sketch to manage complex rendering processes
Capturing multiple angles of a 3D scene for stereographic images
Creating a real-time anaglyph rendering pipeline
Commentary
Stereographic 3D is really hot right now, they say. That said, stereographic imagery has been fascinating to me since I was little. Fortunately, a recent visuals project afforded me a great opportunity to try my hand at creating real-time anaglyph 3D imagery.
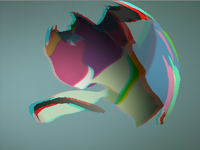
Using a similar framework as Recipe 43, this extends the functionality of the master rendering patch to provide anaglyph 3D output. Specifically, this is designed to work with the classic paper red and cyan glasses. Using this recipe, you can take modules created for use with the RenderMaster patch and use them in a stereographic scene. The nice part about anaglyph 3D is that you don't need any special equipment to display the content.
Ingredients
jit.gl.sketch
jit.gl.texture
jit.gl.render
jit.gl.videoplane
textedit
text
Technique
Following the same methodology as Recipe 42: RenderMaster, this patch uses jit.gl.sketch "drawobject" messages to manage multiple rendering passes. In this case though, we are rendering the same scene twice. Once for the left eye, and once for the right eye. Stereographics works by showing a slightly different view of the same scene to each eye, mimicking our natural facilities for perceiving depth in the world around us. In order to achieve this, we have to use "glulookat" messages to move the camera to different positions for each rendering pass. The "glulookat" message is a convenient combination of the "camera", "lookat", and "up" messages to jit.gl.render. When used in the context of jit.gl.sketch, it allows you to set the viewing angle and position of the camera when rendering the objects.
Inside the "final_output_objects" subpatch are the two textures that we are capturing our scene to. We also have two jit.gl.videoplane objects to display the two views. You will notice the color attributes of the two videoplanes are set to "1 0 0 1" and "0 1 1 1" respectively. This limits the left view to only red colors, and the right to only cyan.
To test this patch out, get yourself some 3-D glasses, load up the "simple_test" patch included with Recipe 42 and try loading some textures. Try adjusting the values of "camera-shift" and "channel spread" to get the best depth effect. You will notice that the depth effect looks best with several overlapping layers and textured objects with alpha transparency masks.
by Andrew Benson on September 13, 2010

