Jitter Recipes: Book 2, Recipes 14-25
The second installment of Jitter Recipes is a collection of simple examples that began as weekly posts to the MaxMSP mailing list. Here you will find some clever solutions, advanced trans-coding techniques, groovy audio/visual toys, and basic building blocks for more complex processing. The majority of these recipes are specific implementations of a more general patching concept. As with any collection of recipes, you will want to take these basic techniques and personalize them for your own uses. I encourage you to take them all apart, add in your own touches and make these your own.
Recipe 14: JitBuffer Exposed
General Principles
Using jit.buffer~ to create simple audio solutions.
Using jit.matrix "exprfill" message
Commentary
This example shows a couple of techniques that take advantage of the matrix interface of jit.buffer~.
Ingredients
jit.buffer~
jit.fill
jit.slide
jit.matrix
Technique
On the left half we are recording a live signal into the upper buffer. This buffer is then output as a matrix, and fed through the jit.slide object to slowly fade between buffer states. This faded buffer-matrix is then loaded into the second jit.buffer~, which is what we will use for playback
On the right half, we use a multislider and jit.fill to provide an easy drawing interface for waveshaping. Inside of the "use exprfill" subpatch, we've provided several common expressions that can be used to fill a jit.matrix with a windowing curve. This is particularly useful for doing granular synthesis.
Recipe 15: GestureRecord
General Principles
Recording gestural parameter data over time
Commentary
When recording high resolution videos from Jitter, it is often very difficult to get acceptable results from real-time manipulation of parameters. For this reason, it is often helpful to record real-time parameter changes on a frame-by-frame basis, and then play back these parameters at a rate that jitter can keep up with.
Ingredients
pattrstorage
autopattr
jit.coerce
jit.qt.movie
jit.qt.record
Technique
On the left half, we are using the pattrsorage object to save the state of all the named UI objects for each "frame". The benefit of this implementation is the ease and robustness of the pattr-family of objects as well as the ability to save the state of objects such as matrixctrl.
The right half uses a matrix to store our parameter values, and then records frames into a jit.qt.record object.
Note that we're using jit.coerce to force our float32 matrix into an acceptable format for QuickTime (char).
Recipe 16: VideoSynth2
General Principles
Using Jitter to create generative video
Using Matrix feedback and distortion to create movement
Commentary
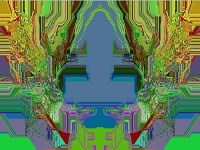
This example is functionally very similar to the VideoSynth1 patch, except that we're using jit.repos instead of jit.rota to do the image distortion.
Ingredients
jit.poke~
jit.matrix
jit.dimmap
jit.glue
jit.xfade
Technique
We are using jit.poke~ to perform automatic drawing on a named matrix (see VideoSynth1)
This matrix is then distorted using jit.repos and then fed back to be drawn again using our named matrix.
To generate a constantly shifting repos-matrix, we've implemented a similar tactic as that used for the drawing (see bot2 subpatch). This matrix is then mixed with a matrix of normalized coordinates generated by the jit.expr object. This has the effect of gently repositioning the matrix at each frame, thus giving us smooth movement.
The output of jit.repos is then mirrored by sending it to jit.glue and inverting the x-dimension of the right input using jit.dimmap.
Recipe 17: TwineBall
General Principles
Using the stroke messages to jit.gl.sketch to render curves in OpenGL
Using a matrix to generate sketch commands for procedural drawing
Commentary
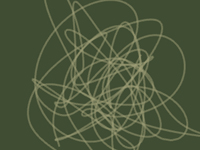
With the introduction of JSUI, "stroke" commands were exposed for generating spline-curves. While this is pretty well-documented in the JavaScriptinMax PDF, many people aren't aware that you can also use these commands with jit.gl.sketch to do curvy line drawings.
Ingredients
jit.gl.sketch
jit.matrix
jit.iter
jit.op
Technique
The movement of the points is generated by adding a matrix of motion-vectors (see ParticleRave-a-delic)
This matrix of point-locations is then sent to jit.iter to be broken down into 3-part lists.
For every matrix that is sent, we reset our sketch object and then begin our stroke using the "beginstroke line" message, and specifying the order (or smoothness of our curve) as well as color and width.
Each point of the matrix is then sent using the "strokepoint...."
Recipe 18: Manipulator
General Principles
Using expressions to generate values across a matrix
Texture Mapping
Reshaping a NURBS by setting control-point coordinates
Commentary
Sometimes, when learning the ins and outs of OpenGL, it helps to be able to see just how this matrix of vertices is affecting our geometry. This example uses jit.cellblock to provide a visual interface to our matrix data. This allows us to perform precise distortions of our surface, which can be very useful for generating interesting graphics.
Ingredients
jit.cellblock
jit.matrix
jit.gl.slab
jit.pack
jit.gl.nurbs
jit.qt.movie
Technique
Using the "exprfill" message, we load our first two planes with signed-normalized values across the x and y dimension respectively. This gives us values between -1. and 1. By filling these matrices in such a way, we create a plane across the x and y coordinates of our GL-world.
The z-plane is left empty for us to fill in as desired to create spatial distortion.
All of these matrices are then packed into one 3-plane matrix and sent on as the "ctlmatrix" for jit.gl.nurbs
We use jit.gl.slab to map a movie onto our jit.gl.nurbs shape. We could also load a shader program into this object to do processing on our texture.
Recipe 19: Tannenbaum
General Principles
Creating one's own particle system using matrix operations
Rendering multiple copies of the same geometry
Manipulating text using matrix operations
Holiday visuals
Commentary
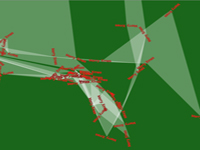
This patch was published for Xmas 2005, which should explain its holiday aesthetic. A particle matrix is generated which is then rendered as floating text-strings as well as vertices of a jit.gl.mesh. The text is also messed with a bit using some matrix processing.
Ingredients
jit.str.fromsymbol
jit.gl.text2d
jit.gl.mesh
jit.matrix
jit.poke~
jit.op
jit.expr
jit.map
Technique
The motion of our particle system is generated by our "motion" subpatch, which manipulates the values of our motion-vector matrix "season". This matrix is then scaled down using jit.map, and then added to our position-matrix "cheer" (see Particle-Rave-a-delic). The jit.expr object is used to kill off old particles and reset them to 0. using the fourth plane of "cheer".
The text sprites are generated by using jit.str.fromsymbol to convert the text to a matrix, which is then fed into a jit.op object to get randomized every three seconds. This matrix is then sent on to the jit.gl.text2d object to be rendered as bitmapped text on an OpenGL plane. This is repeated for every cell of the "cheer" matrix (see gLFO).
The white strip is generated by simply passing "cheer" to our jit.gl.mesh object with @draw_mode set to tri_strip.
Recipe 20: Squelcher
General Principles
Using video to create synthesis parameters
Creating audio-rate sequencing of parameters
Commentary
This example is the result of some after-hours patchery around the Cycling '74 office. If you still haven't figured out why you'd want to bother with a jit.buffer~, this patch should be all the convincing you'll need. The easy interface between video and audio makes for some pretty unpredictable and intriguing effects.
Ingredients
jit.buffer~
jit.altern
jit.brcosa
jit.rgb2luma
jit.qt.grab
jit.matrix
jit.fill
jit.scissors
jit.pack
sync~,rate~, and all sorts of MSP objects
Technique
Using jit.qt.grab, we take the input of our camera, which is downsampled to 64x4 pixels, as this is all the data we will need. This video matrix is then sent into our "buffer2" subpatch for processing.
Using jit.altern to create periodic breaks and jit.brcosa to manipulate the brightness and contrast, we manipulate our video data to give us more desirable results. This matrix is then converted to a 1-plane luminance matrix,broken up into 4 rows using jit.scissors, and then packed into a 4-plane matrix. This is then used to create a 4-channel jit.buffer~
A second jit.buffer~ is filled using the familiar multislider-jit.fill combo (see JitBufferEx).
Rather than playing these buffers back as waveforms, we instead use them as CV-like controls for our synthesizer. These controls can be assigned using the matrixctrl UI.
Inside the "synth" subpatch we find all of our MSP processing, which I leave to your own experimentation.
Recipe 21: SceneProcess
General Principles
Capturing OpenGL geometry to a texture
Using GLSL shaders to perform efficient video processing
Adding video effects to a live OpenGL patch
Commentary
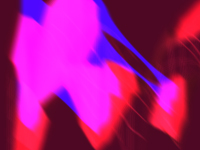
One of the downfalls of using OpenGL can be its overly sharp look, which is difficult to combat without doing some video processing. Unfortunately, rasterizing OpenGL back to the CPU can blast your FPS. Luckily, with Jitter 1.5 we have the ability to do processing on the GPU using GLSL shader programs. By capturing our OpenGL geometry to a texture, we are able to apply video effects to our scene without losing FPS.
Ingredients
jit.gl.nurbs
jit.gl.texture
jit.gl.slab
jit.gl.videoplane
jit.expr
Technique
Our geometry is generated using jit.expr with an internal instance of jit.noise to create randomness. Note that we must turn off the @cache in order for our expression to be evaluated, since there is no input.
By using the @capture super, we tell jit.gl.nurbs to render to our jit.gl.texture named "super" instead of rendering to our render context.
Once we have the rasterized geometry in texture form, we can then use jit.gl.slab to process our scene.
Recipe 22: CatchNurbs
General Principles
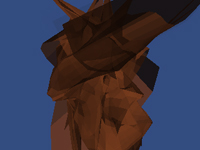
Using audio to control OpenGL geometry
Commentary
This patch is a good demonstration of taking data in one form, and forcing it into a completely different form for the purpose of driving other processes. When doing work with transcoding audio into video, it helps to have several tricks like this.
Ingredients
jit.catch~
jit.matrix
jit.scissors
jit.pack
jit.op
jit.gl.nurbs
jit.slide
Technique
Our audio is converted to 1-D matrices by the jit.catch~ object and then downsampled and passed along to a matrix using "dstdim" messages (see TimeScrubber). The resulting matrix is then downsampled further, sliced into 3 columns and packed into a 3-plane named matrix.
From there, we use jit.slide to smooth the movement, and jit.op to scale the values to the desired range. This is then given to the jit.gl.nurbs object as a "ctlmatrix".
Recipe 23: ElapseGraph
General Principles
Creating visual display of Audio data
Procedural drawing using OpenGL commands
Commentary
Often, when working with audio data, it helps a great deal to be able to visualize the data that is coming through your patch before deciding what to do with it. This example shows a way to visualize the envelope, or amplitude data of an audio signal, using jit.gl.sketch.
Ingredients
jit.poke~
jit.matrix
jit.iter
jit.gl.sketch
Technique
The absolute-value audio signal is drawn into the second(y) plane of our matrix using jit.poke~. The first(x) plane is generated using the "snorm[0]" expression.
For each matrix that we send out, we step through our drawing procedure. The trigger object is very helpful for this.
Our drawing prodedure works as follows:
reset the jit.gl.sketch
draw the background rectangle
draw the blue-line
draw the start-point at (-1.,-0.5,0.)
draw a line segment and point for each cell of the matrix
draw the end-point at (1.,-0.5,0.)
Note that we are using jit.gl.render with orthogonal rendering turned on. This allows us to do flat 2D drawing without perspective distortions.
Recipe 24: GLFeedBack
General Principles
Using the GPU to perform typical video effects
Capturing OpenGL scenes to textures
Commentary
With the SceneProcess example, we saw a way to render geometry to a texture using the capture attribute. This example demonstrates a way to set up the "to_texture" message for doing video feedback effects on an entire OpenGL scene.
Ingredients
jit.gl.videoplane
jit.gl.render
jit.gl.texture
jit.qt.movie
Technique
As is typically the case in Jitter, order of operations is very important here. We must make sure that everything is rendered to our scene before rasterizing it to a texture. Note that the "to_texture" message comes last.
We are using two different jit.gl.videoplane objects. One of these simply displays the output of our jit.qt.movie, with additive blending turned on. The other one will display the texture generated by capturing our scene.
You will notice that we must always render to a texture that has the same dimensions as our rendering context. To work around this, we have two different textures to switch between for fullscreen mode.
Recipe 25: RagingSwirl
General Principles
Performing manipulations of a 3-dimensional matrix
Using Audio signals to generate video
Matrix feedback
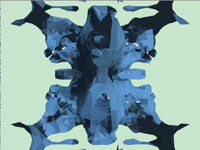
Visualizing 3-D data as a geometrical figure
Commentary
The mechanics of this patch are nearly identical to the VideoSynth1 patch applied to a 3-D matrix, with a very different effect. Through clever use of jit.dimmap and jit.rota, we are able to create complex motion in three dimensions. The resulting shape constantly shifts, swirls and mutates.
Ingredients
jit.gl.isosurf
jit.poke~
jit.rota
jit.dimmap
jit.matrix
Technique
The jit.poke~ drawing subpatch should be familiar from previous recipes (see AsteroidGrowths,VideoSynth1)
Because jit.rota will only perform 2D rotations, we need to use jit.dimmap to reassign our dimensions and then perform a second rotation.
We then need to replace our dimensions using jit.dimmap again. This matrix is then fed back to be drawn over in the next iteration.
After we perform our rotations, we do quad mirroring by using jit.rota in boundmode 4 (fold), and then set the jit.rota to double the x and y dimensions. We could also double the z dimension as well if we wanted to do octal mirroring.
Once our matrix has been prodded and twisted sufficiently, we send it off to be rendered using jit.gl.isosurf.
by Andrew Benson on February 14, 2006

