
On The Road: Audioease
Our "On The Road" reports normally involve Cyclists making a quick visit somewhere and reporting on what was there. Well, I’m certainly “on the road” (in the Netherlands), but this isn’t going to be a breathless dash through Schipol and back in N days. Instead, I have some time to see and do things in a little more relaxed fashion, although I am still reporting from an “exotic location” (for an American midwesterner, anyway).
For those of you who don't know, Cycling '74 is a distributed company; while we're "located" in California from a legal point of view, there isn't a "home office." In fact - apart from some shared space in Berlin - there is no office at all. We're widely distributed throughout the world. Our offices are where we are, and we’re often the only people there (here’s my office, at the moment):
One side effect of this situation is that I'm curious about where my colleagues work, and even more curious about where people in the industry who do have actual offices work. So, for this edition of On The Road, I’m going to cycle across town to visit the creators of some of my go-to sound design tools: Audioease.
Disclaimer: I am an Audioease fanboy from waaaay back. Early Altiverb 1.0 adopter, and still a very happy user. I was curious about their home base, and wondered about how they did some of the stuff they did.
Arjen van der Schoot met me at the door on a slightly overcast afternoon at the edge of town in a quiet building that includes their offices and some private studio spaces.
Fortified with a midafternoon espresso, I ventured upstairs to the Audioease lair, which does not resemble my office at all.
See the artificial head in the picture on the wall? I’ll be returning to it in a minute
I am often struck by how quiet places where people write audio code can be. When I commented on this, I was told that the anechoic chamber was where I should go if I really wanted a little more peace and quiet.
“An anechoic chamber? You have one in your office?”
But it's not all about silence and code. If you know or have ever used the Altiverb, you know that their impulse response catalog is positively astounding - in terms of range and of quality (if you don't know their work, here's a sampling of the spaces available for the Altiverb).
And just in case it's not clear by this list, the folks at Audiease are fanatics when it comes to the quality of the impulse response files they use in their convolution reverbs (unsurprisingly, better gear means better recordings means better IR files means better sound).
Listening Large
A quick look at some images on their website gives you a good sense of how they work - there's a standard "kit" they have for making the site recordings that are transformed into their IR files.
While it's pretty straight ahead to see how these are configured and done for indoor spaces, I was curious about how impulse responses were created when the scales were both larger and smaller. What do you use to produce the test tones you use for site recordings in an underground tunnel or a forest? And how on earth do you create an impulse response for the inside of a motorcycle helmet?
The receiving end of their field recording gear for large spaces (i.e. microphones) is precisely the same as they'd use for the Concertgebouw concert hall - a case full of really good microphones [for the gear pr0n folks out there, this case includes some hot-rodded DPA 4006s (They've have been rid of their transformers - so they're effectively 4006TLs) and a pair of the latest generation DPA 4006s. Mmmmm. Shiny....].
But I was more curious about the part of their outdoor/large spaces field gear that makes the noise - so Arjen introduced me to the official Audioease field cart. I should have figured what was up when he introduced me to "one of their most important pieces of field gear," I think.
Behold the majesty of the Audioease-o-saurus Rex!
Okay - it's a handcart with a battery pack, a nice amp, an audio player, and a single speaker mounted and arranged to that aligning the speaker is a simple matter. I didn't ask whether it was repurposed for office cookouts.
And the kit included a few essential field tools I hadn’t really seen coming: An official Dutch bicycle pump repurposed for remote field recording cart maintenance, and the humble garden hose rack for those reeeeeeeealllly long mic cables. That’s how those Impulse Response (IR) files are recorded for football stadiums, underground tunnels, and forest glades!
Under The Helmet
At the other end of the Audioease tool kit, there are tiny sampled spaces available, too. Here, again, the drive for fidelity reveals itself in some amazing ways. My guess was that one would have to use really tiny microphones, and have something on hand for modeling the head/ear, too. So I asked and discovered that - once again - the part of the process that delivers sound wasn't what I expected. Behold the um... helmet hole?
Simply put, their solution involves positioning a speaker beneath the helmet space and then feeding the audio directly into the head/mic/helmet assembly. Of course, using a tube like this introduces some distortion to the process. But no problem - they're written a custom filter that corrects for the problem. This same setup can be used for capturing other small spaces as well (for those of you who long to crank your amp up to 11 and perform inside of a teapot).
Speakerphones And Beyond
I'm always interested in the ways that companies decide "what to do next" - in the case of Audioease, that's involved software and also interesting test equipment. As they've grown and developed as a company, Audioease have expanded their products to work in post-production environments in various ways - their Speakerphone plug-in combines impulse responses for speakers, microphones, various kind of 'covers' (blankets, closed car trunks, and so on), rooms and various ambient recordings, and effects.
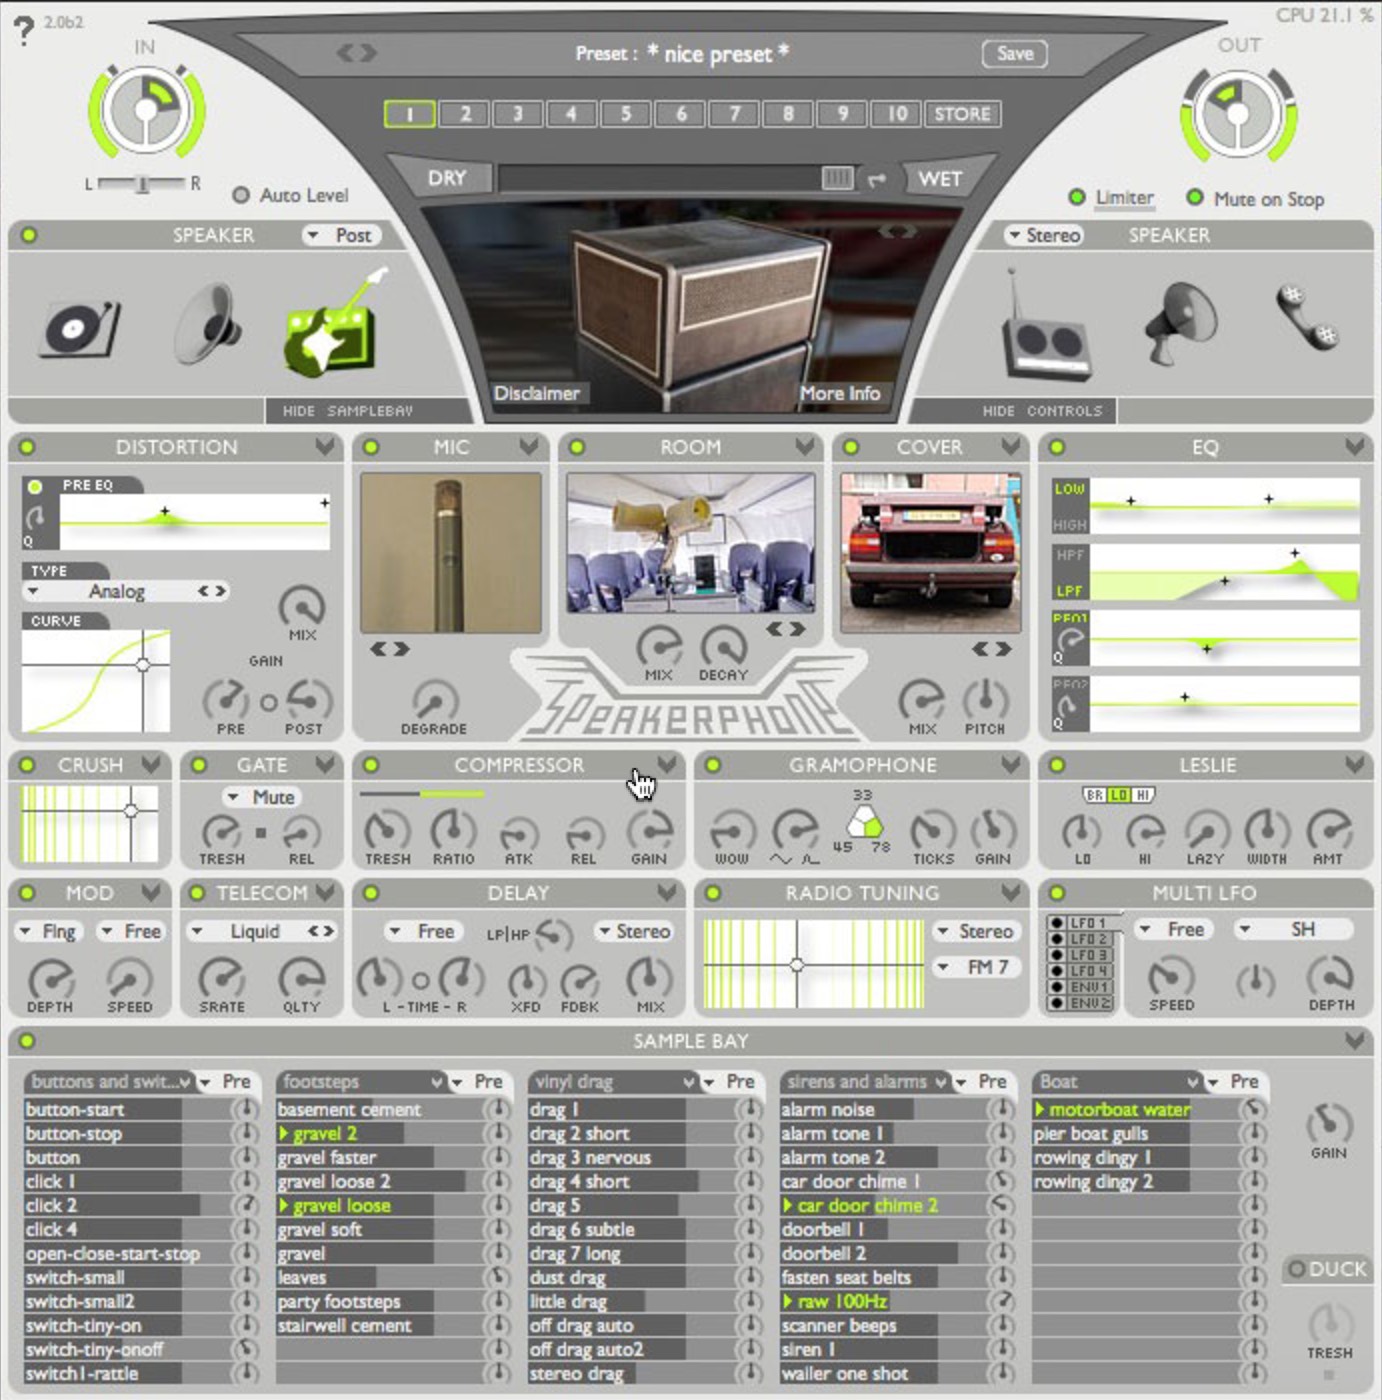
The ability to combine those things on the fly is amazing for sound design.
The next step along the way is Indoor - a plug-in that seems to have rethought their user interface design for post-production sound. It combines a collection of predesigned spaces of various sorts with drag and drop speaker and microphone pairs.
In addition to repositioning, you can also group mic/speaker pairs together and reposition the groups. It’s tremendously intuitive, and amazing to work with.
A product like Indoor has a whole new batch of interesting problems in terms of thinking about spatial positioning and audio verisimilitude, of course. Even when you've got the DSP code, you still need to trust the final arbiter: you ears.
My favorite piece of test equipment I paid homage to during my visit appeared in the earlier photo of Jankoen and Jerre - The Head.
It all started from a desire on Arjen's part to verify the precision of their placement algorithms. He didn't want to trust either a mere styrofoam head or a set of generic ear models - they didn't match his own. So, with the help of colleagues, he slathered his torso and head with casting material and made a replica of his own head, and then made a set of perfect ear molds to create a test head that as perfectly duplicated his own set of evaluative apparatus (i.e. his own head) as he could.
Yes, that’s Arjen under there. He is trying not to smile.
After all that work, his testing still wasn't right - until he realized that his real head had headphones on. So he adapted the whole apparatus to compensate for that and... hey presto. Fidelity he could believe in.
There Are 360 of Them
My final look involved something they were working on that was totally new to me: tools for VR and ambisonics. Their 360pan suite is a pair of plug-ins that look like the right tool for adding realistic audio to 360-degree VR movies; taken together, the package lets you pan sounds onto the object in video and also let you monitor the ambisonic stream for the video you want to upload. It’s currently available for ProTools AAX and Mac only, with additional support on the way.
As you might imagine, working with audio sources in virtual reality presents some particular challenges as compared to audio source placement where the viewer’s frame of reference can shift rather than being fixed – anything that disrupts the illusion is a complete application killer.
So how do you test, verify, and calibrate for that?
That requires a good place to do calibration and verification - and, as promised, Audioease has something no office of mine has ever had - an anechoic chamber. The test rig is pretty interesting: a stool with 15 degree markings, a designated center, and an array of Genelecs at various azimuth angles.
A “calibrated” stool with 15 degree markings, a properly marked “center” for the anechoic chamber, and a speaker test rig to testing various azimuths as well as rotations
It was an amazing afternoon, and I really appreciated Audioease’s hospitality. These guys are really serious about knowing exactly where they’re at, and where it’s coming from. And I’ll keep an eye on where it’s going.
Sorry – I can’t resist: here’s one more microphone glamour photo for readers: a really snappy Sennheiser ambisonic microphone.
by Gregory Taylor on March 1, 2017


