My Favorite Object: curve~
Fades are one aspect of audio engineering that I can get overly obsessive about. In my Pro Tools sessions, I custom automate every fade, making sure each automation point is set to the right dB level. For the longest time, I was unsatisfied with the automated fade possibilities in Max - I could easily construct a patch that performed timed fades with a line~ object, but the fades never sounded right since the object outputs linear ramps. Then I discovered the curve~ object which - unlike line~ - produces nonlinear ramps. Depending on which value you set for the “curve parameter,” you can create either exponential or logarithmic curves.
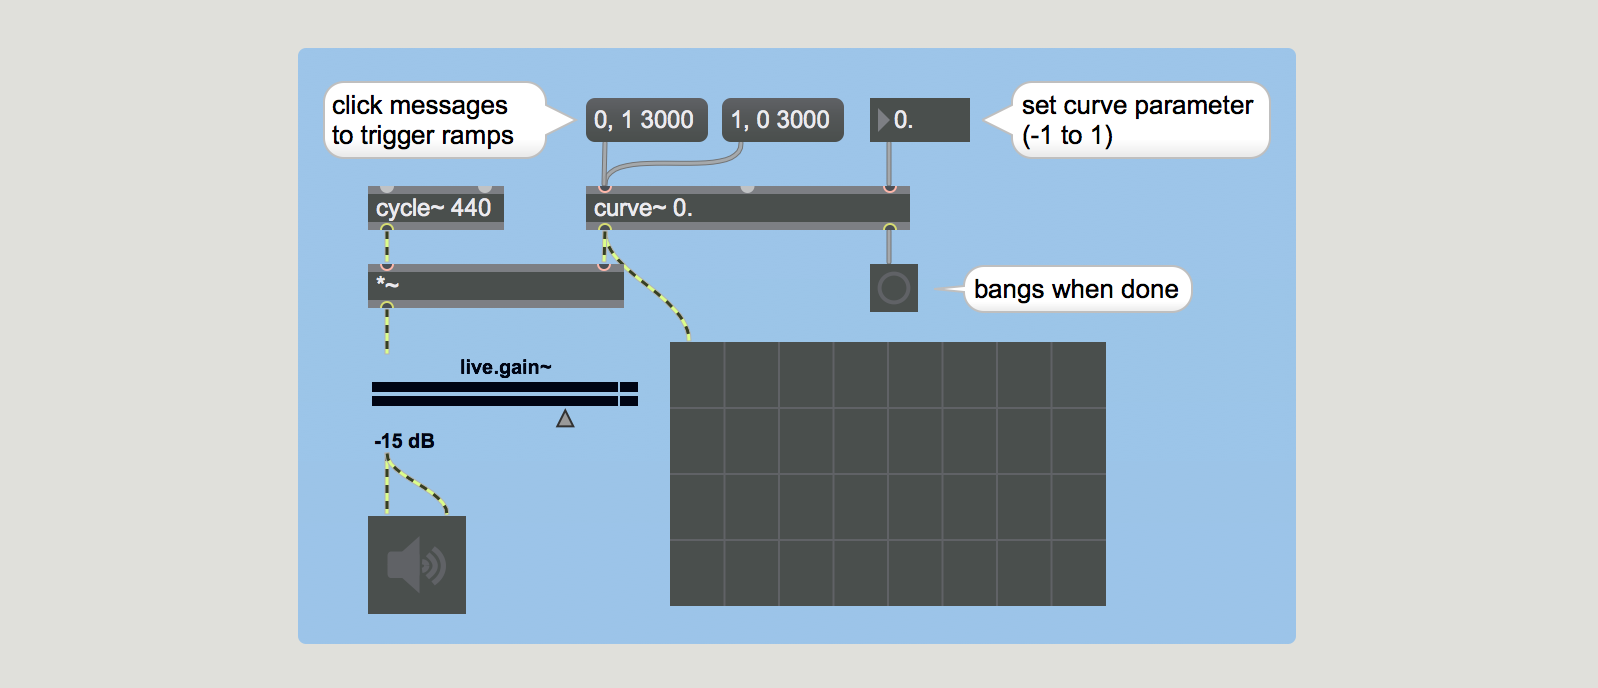
In the first patch provided, you can see the basic operation of the curve~ object. As with the line~ object, you send the object a message that specifies the starting point, the ending point, and how long it should take to get there. However, unlike line~, there's a third inlet where you can set the curve parameter. Values from 0. to 1.0 will produce an exponential curve, and values from -1.0 to 0. will produce a logarithmic curve. At a value of 0., the curve will be a straight line. The farther away the value is from 0., the steeper the curve will be. Try setting the curve parameter to different values and hear what happens.
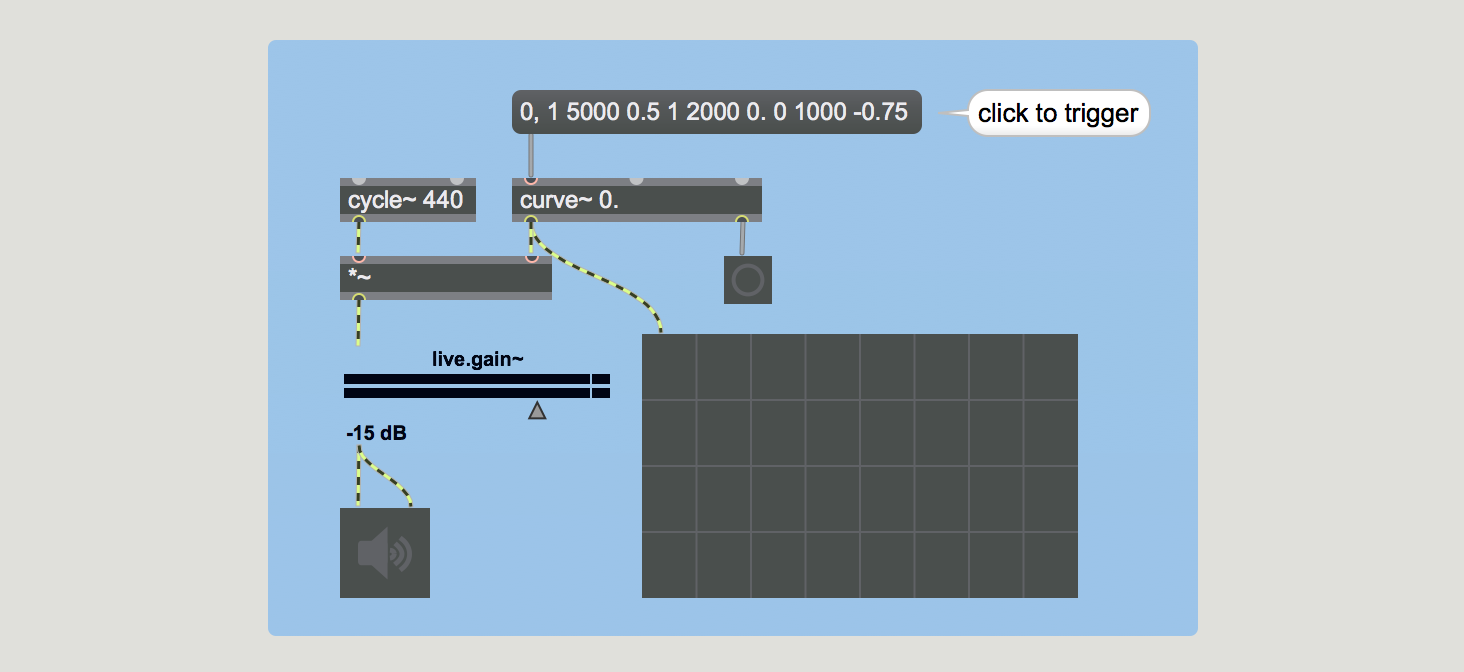
The second part of this patch illustrates how to set the curve parameter within a message, so you don't need to use the third inlet. This can be very helpful if you want to create an automated fade that uses different curves for the fade in and fade out. In the example provided, the sound starts at an amplitude of 0, fades up to full volume (1) over five seconds using an exponential curve, remains at full volume for two seconds (this is specified by the volume level staying the same and the curve set to 0.), then fades out over one second using a steep logarithmic curve. You can automate some pretty dynamic series of fades using this method.
What if you want to create a crossfade? Easy - simply create two curve~ objects whose messages are banged with the same button. One curve~ object should be connected to the first sound, and the other to the second. The only possibly tricky part of this is that you have to make sure the timing adds up in each message (i.e. the total time in each message should be the same), and you have to set your curve parameters correctly.
Patch #2 contains a few examples of classic crossfades you can create. This patch is not hooked up to audio - it's only used for visualizing the fades. If you want to use these examples for audio purposes, you will not need the trigger object or the bufferwrite subpatch - these again are only used for visualization.
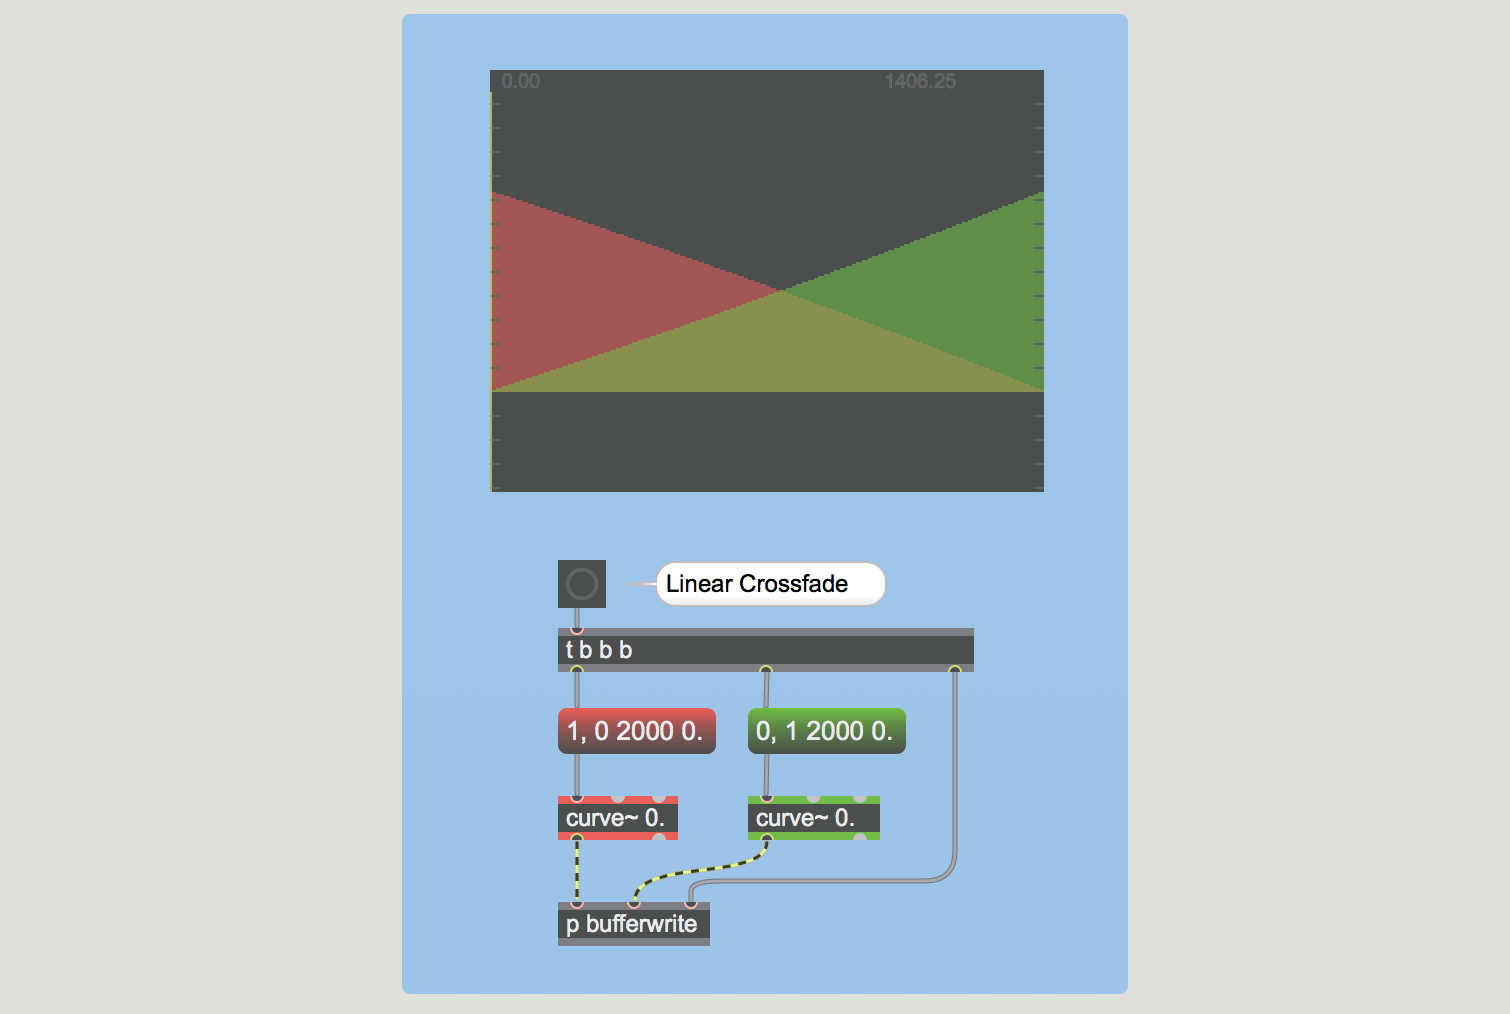
The first example is of a linear crossfade, which uses a curve parameter of 0. This is, of course, the least interesting example, since you can do the same thing with a line~ object.
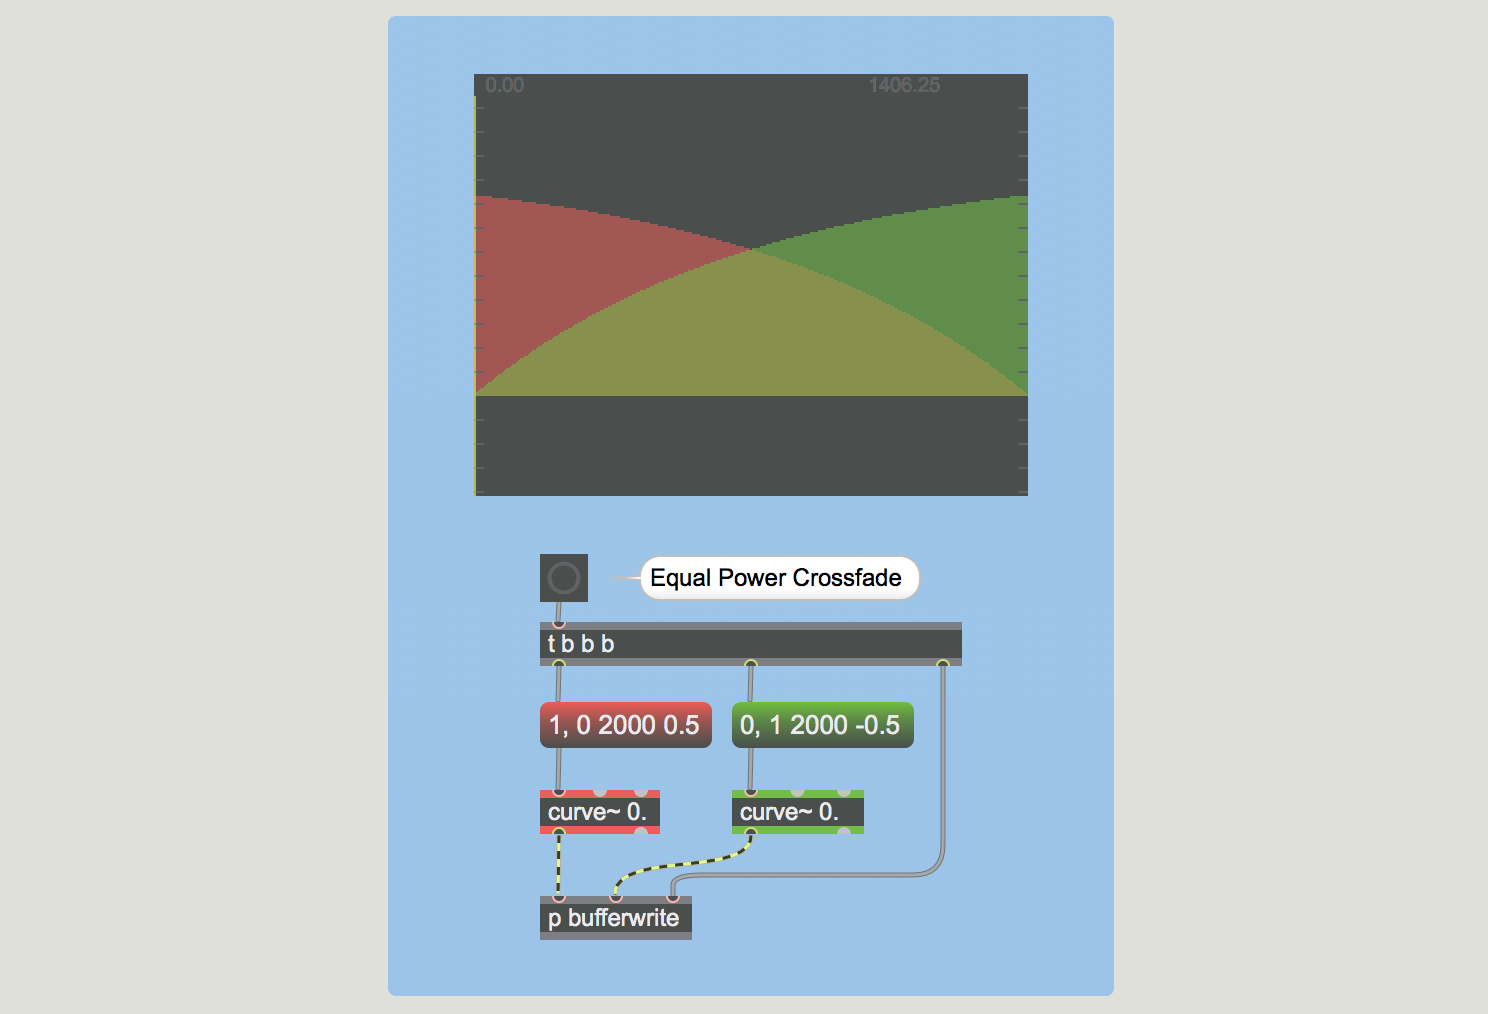
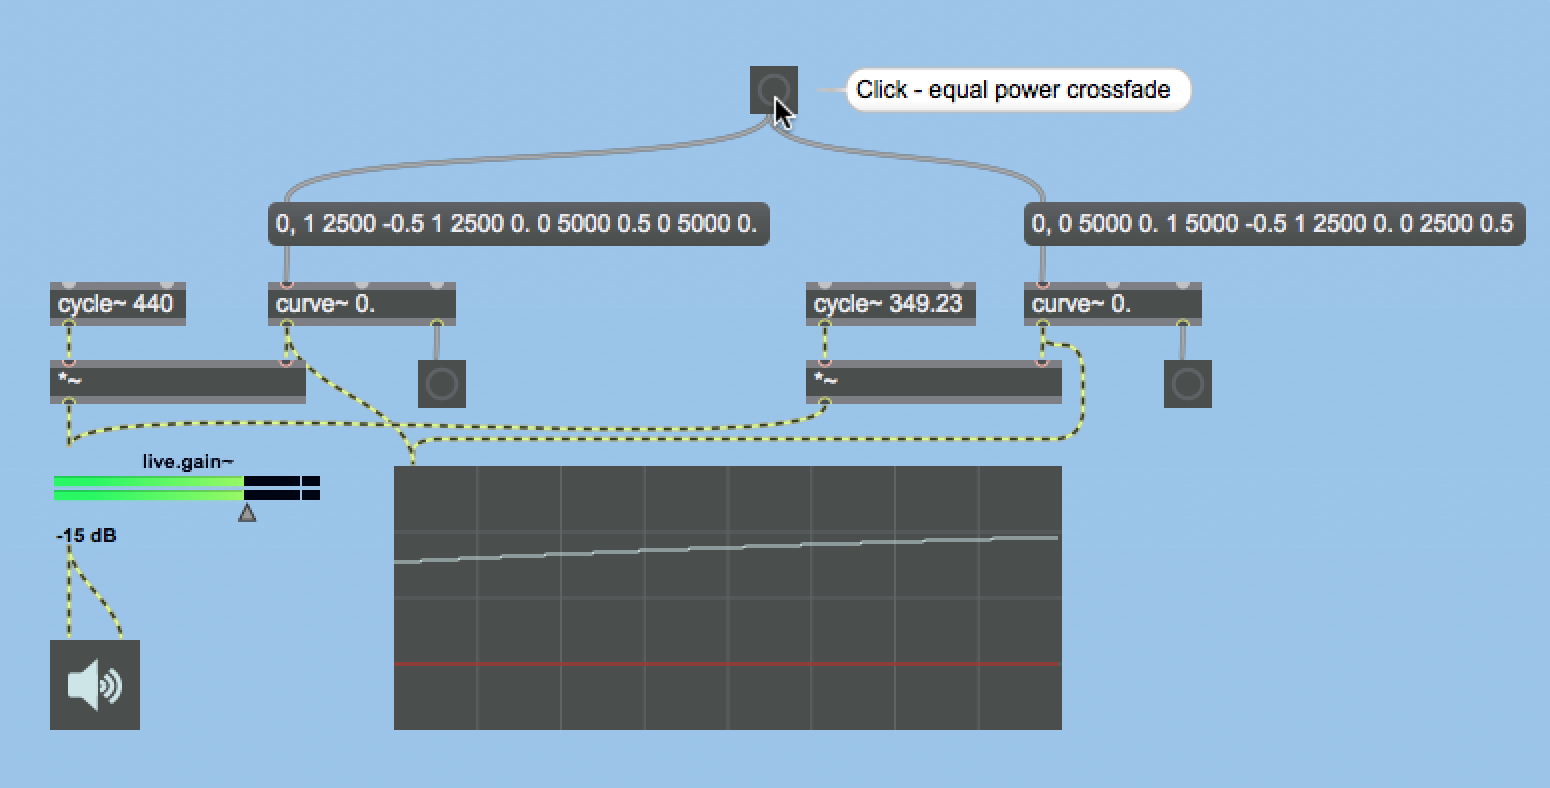
The second example is of an equal power crossfade, which is probably one of the most commonly used since it maintains a consistent perceived volume level. If you look at the messages controlling the fade, you'll notice that the curves are mirror images of each other, as in the linear crossfade. What makes this example different has to do with the curves we specify in the messages. This fade has a logarithmic curve (0.5) on the fade out and an exponential curve (-0.5) on the fade in.
To see how you would program an equal power crossfade between two sounds, take a look at patch #3. In this patch, I automated it so that sound #1 (on the left) fades up first, then crossfades with sound #2, which fades out a few seconds later.
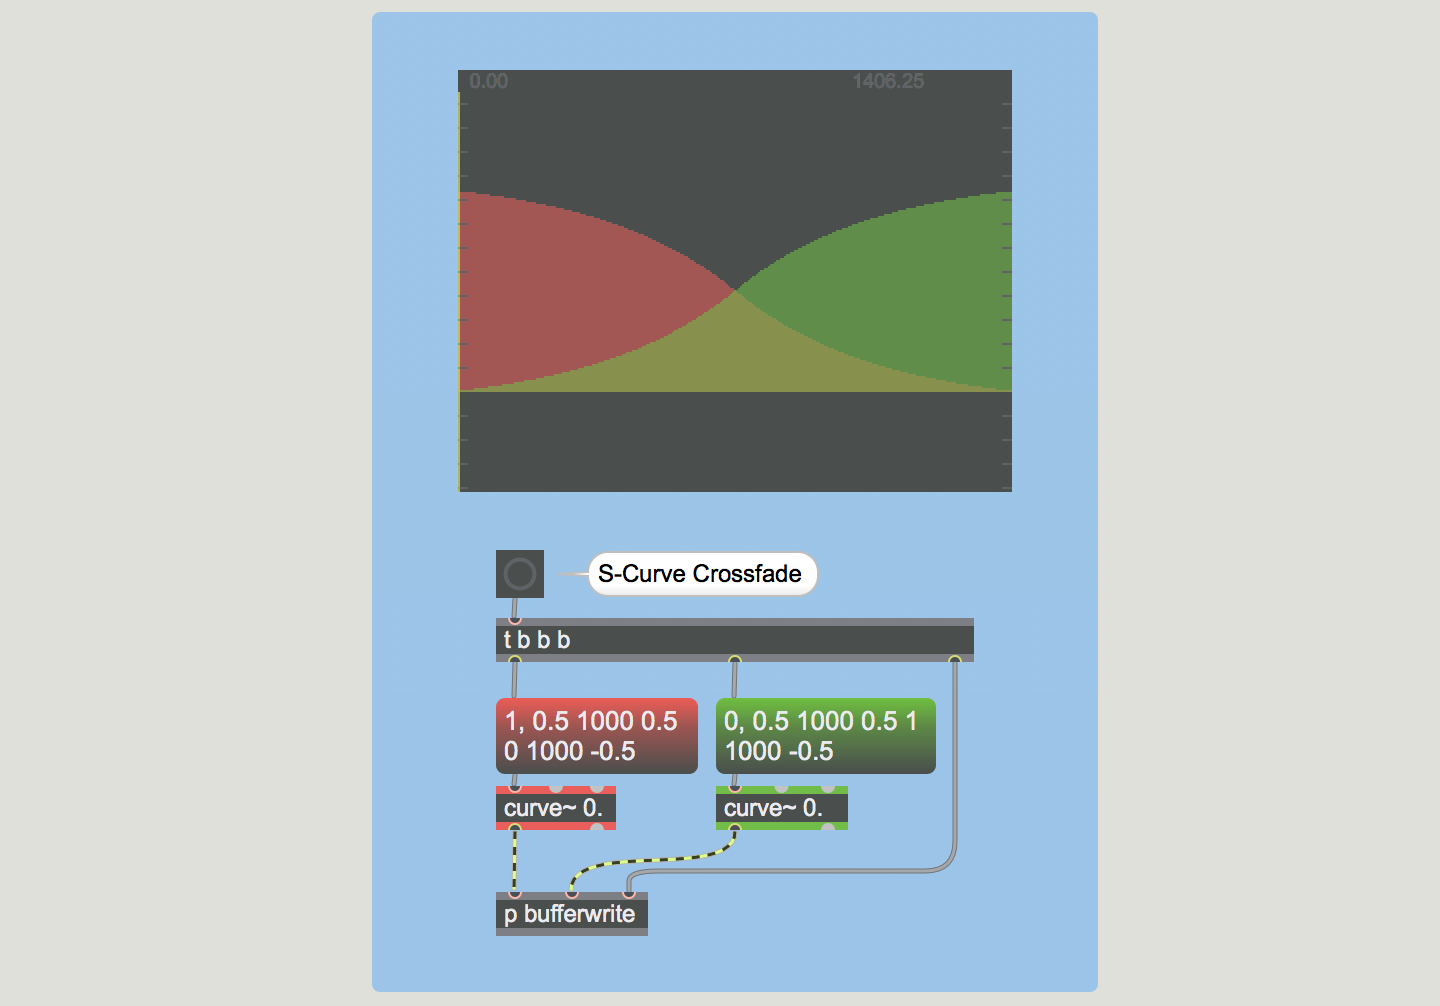
The third example is of an S-curve crossfade. Since an S-curve contains two different curves in the same line, you have to specify the time at which the curve should change. So on the fade out, sound #1 goes to an amplitude level of 0.5 in one second with an exponential curve, then to 0 in one second with a logarithmic curve.
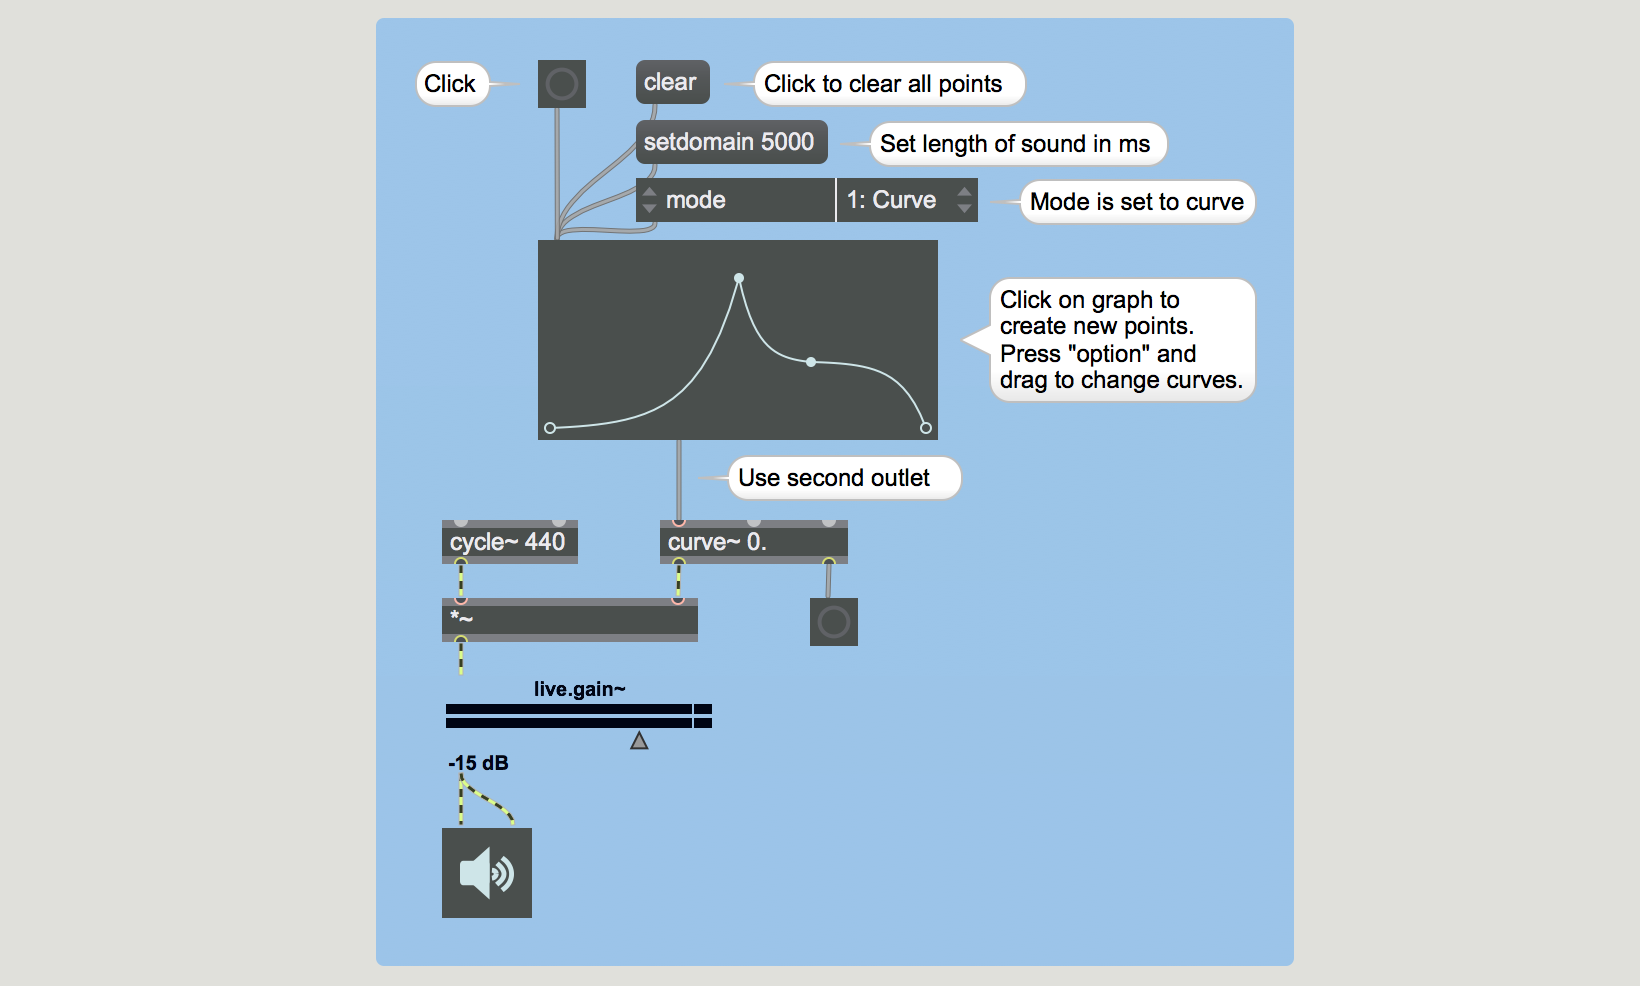
Finally, for those of you who would rather draw your own custom fades instead of defining them with a string of numbers, you can use the function object in conjunction with curve~. Patch #4 shows you how this works. Make sure to set the mode of the function object to “Curve.” Now, once points are entered on the function graph, you can adjust the curve between each point using your mouse by pressing and holding the Option key (Mac) or the right-hand mouse key (Windows).
While all of these examples only use the curve~ object as a tool for audio fades, you can use this object for other purposes as well. The next time you find yourself in a situation where you would like to control the ramp of something at audio rate, hook up a curve~ object and see what happens!
Learn More: See all the articles in this series
by Ashley on July 18, 2017

