Synth-Building with Max/MSP #3
This series of tutorials first appeared on my CreativeSynth.com website between 2001 and 2002. Due to their popularity (especially amongst new Max users), I have moved them to the Cycling74.com website. Read the introduction.
Sorry for the long delay - the real world has a way of getting out-of-hand. Nevertheless, we shall continue...
In our last article, we beefed up our basic synth by adding volume control using an A/R envelope. Now that we have some control over the basic amplitude, it's time to move onto filtering.
Tutorial Series
Filtering is almost the most important timbral control of a synth. You can take almost any reasonably complex sound and tone it down to be useful in the appropriate context. Filtering is part of Subtractive Synthesis - the process of starting with complex sound, and subtracting harmonic information until you achieve a useful sound.

In order to make our synth more useful, we are going to make a slight change to the basic synth we created in article #2. Instead of using the cycle~ oscillator, we will use the phasor~ - which gives us the harmonically more complex sawtooth waveform. This will give us more material to filter, and is better for this type of exercise. Just change the "cycle~ 440." to "phasor~ 440.", and you now have a sawtooth oscillator. Next, we will build up a filter section. There are many ways to do filtering within MSP. You can use the lp~ or hp~ filters, which are simple and "low cost". lores~ gives you a resonant lowpass filter, and reson~ can provide a similar bandpass option. You can also use the biquad~, which can give you a wide range of filter options - but is probably the most complex filter to properly set up.
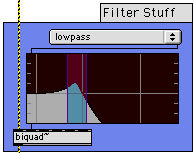
Well, Cycling '74 developer jhno came to the rescue in MSP2, with the filtergraph~ object. This beauty takes all of the work out of creating a usable biquad~ filter setup, and gives extensive real-time control as well. We will use filtergraph~, along with biquad~, to create a flexible and good sounding filter system for our synth.

To set up a biquad~/filtergraph~ filter subsystem, you will need one of each of the objects, as well as a umenu. The biquad~ filter takes the input signal in the first inlet, and a number of coefficients in the remaining inlets. The first outlet of the filtergraph~ filter will provide a list of coefficients that are usable by the biquad~ inlets 2-6. Since it is a list of five numbers, you can send the list to inlet #2, and the individual values will be automatically routed to the five right inlets.

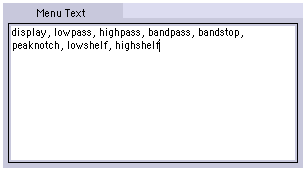
We still have a umenu to deal with - which sets up the filter to conform to a specified type. If you open the umenu Info screen (Command-I), you can enter the menu text in a textedit area. The available settings for filtergraph~ are as follow:
display: only display the result of coefficient settings (not all that useful in this context).
lowpass: typical lowpass filter operation.
highpass: typical highpass filter operation.
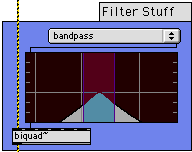
bandpass: typical bandpass filter operation.
bandstop: The reverse of bandpass filtering - in essence, a controllable notch filter.
peaknotch: A notch filter with user-editable peak level adjustment.
lowshelf: A shelving highpass filter - in essence, a "bass tone control".
highshelf: A shelving lowpass filter - in essence, a "treble tone control".
These settings are transmitted as text to the biquad~ object, so spelling is critical. Since text is used, however, it is completely acceptable to have only a subset of the available filter types. For example, for an analog emulator, you could provide lowpass, highpass and bandpass - and the others could be safely ignored. In our example, we will add them all (just to prove we can). Whenever the umenu is changed, the filter functions will change to match.

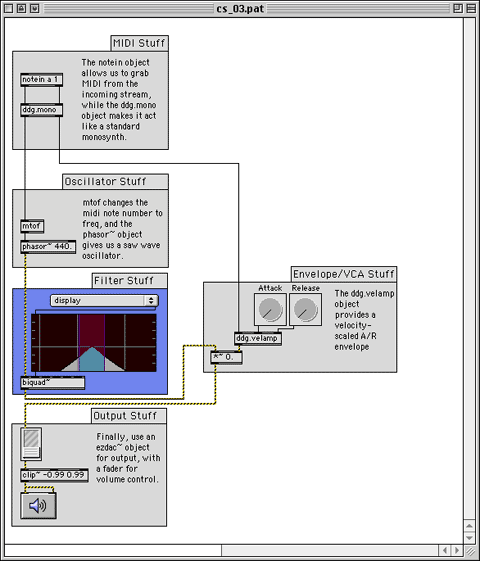
Now, you connect the right outlet (which outputs the selected menu text) to the left input of filtergraph~, and you are set to connect the audio. In our example, we will connect the output of the phasor~ object to the biquad~ inlet #1, and the biquad~ outlet to the velocity input. This will give us a complete audio chain, and allow us to filter to taste.
The final patcher (with filtering) can be downloaded from this link. The image below shows how the filtering system fits into our growing synth:

Take the example patcher and play with the filter. Select every type of filter, and start clicking around the filtergraph~. You will be amazed at the wide range of effects that can be created with this simple set of objects.
[ddg]
Darwin Grosse
03/31/2002
by Darwin Grosse on August 20, 2007

