Tips for Streaming Your Max Patch

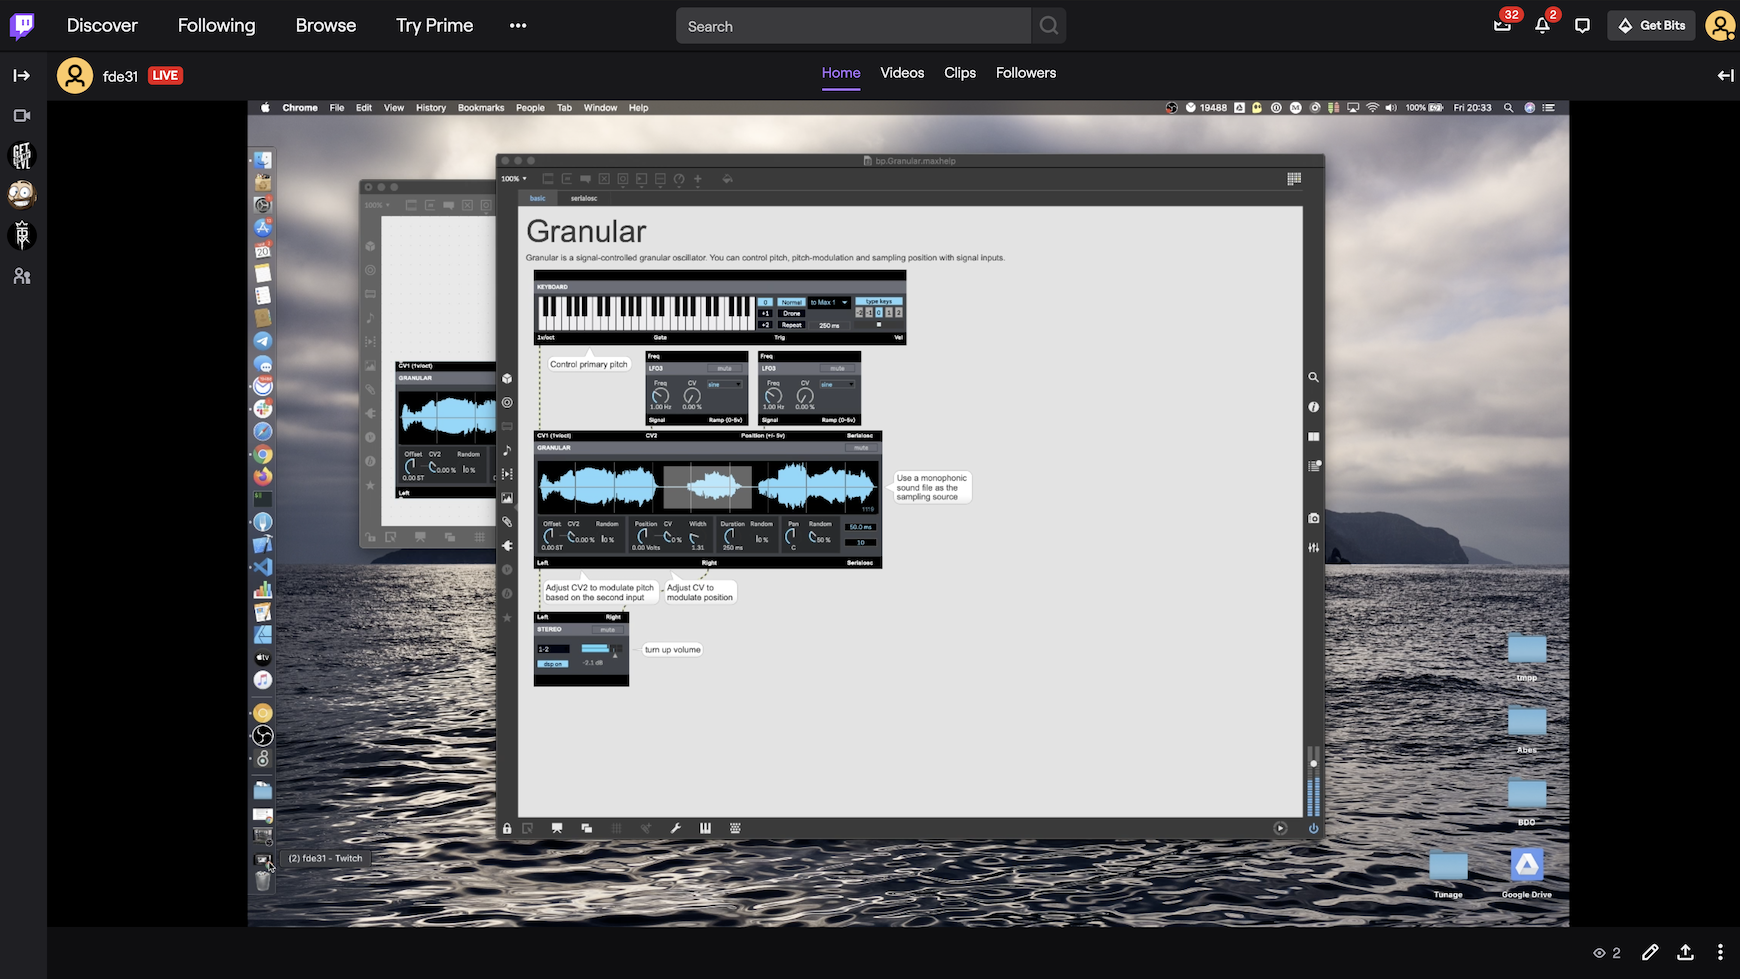
With the increased importance of social distancing, many people are facing the need to teach or present work using Max remotely. Many schools have moved their courses online, and streaming video has emerged as a popular way to connect with people socially across distances. This article will provide some practical tips on how to set up audio and video streaming from your computer in order to share it with others.
Modern video conferencing services and solutions usually apply intelligent filters and compression algorithms in order to optimise the stream for low latency and speech intelligibility, usually at the cost of audio quality. While the following won’t provide an audiophile streaming experience to your audience it does provide a solution where both the latency and quality are good enough to illustrate what is going on with your patch.
While modern browsers are equipped with technology (WebRTC) that allows peer-to-peer communication between users, it’s usually more difficult to set up and furthermore prone to issues with the networking layer if people are behind proxies or firewalls that can often be found in educational institutions. This guide therefore opts for a more classic streaming approach in order to increase accessibility and ease of use.
Check out the other streaming article - Streaming Tips - The Jitter Edition
Requirements
The key idea here is to use local software in conjunction with a streaming platform for creating a video stream that can be accessed by others by means of visiting a url in their browser. Additional to providing a video stream most services include features for interacting with your audience like a live chat or others. In order to achieve this you will need to install the following:
OBS - Open Broadcaster Software as local streaming client
A virtual or physical audio input, which can be used to route the audio output from Max into OBS
examples for virtual AudioDrivers on OSX would be BlackHole or Loopback
You will also need:
In this guide we’ll be using BlackHole as a virtual audio driver, OBS and Twitch as a video streaming service. Twitch offers us the possibility of 160Kpbs stereo audio, as opposed to video conferencing services that usually work with mono and even further compressed audio streams.
Setup
Creating a Twitch Account
If you do not already have an account please visit https://www.twitch.tv and create a new user account to use for your stream.
Configuring Max
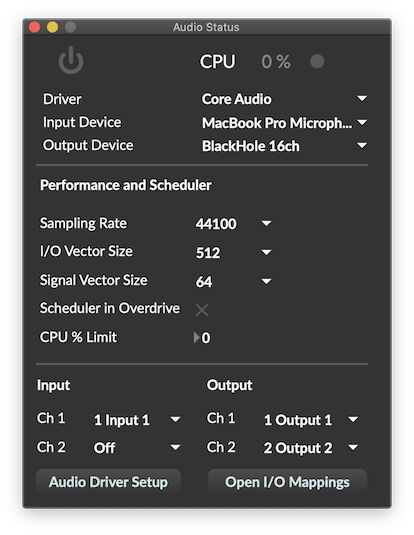
We’ll start by setting up the audio in Max in order to be able to use its output as an input within OBS. Assuming that BlackHole has been successfully installed simply open the Audio Status Window (Options => Audio Status) and select BlackHole as the Output Device. Also make sure that the Sampling Rate is set to 44100.

Adjusting the OBS settings for streaming to Twitch
After successfully installing and opening OBS we need to adjust the settings for streaming to Twitch. In case you are greeted by the Configuration Wizard on your first launch of OBS you can simply skip that for now. To adjust the settings for our Twitch stream open the Preferences (OBS => Preferences) and navigate to the Stream section. Within that section select Twitch as the service, leave Auto as the Server.

Next click on the Link next to Stream Key , which will open your web browser and navigate to the Settings Page of your Twitch Account. Copy your Stream Key from here and paste it into OBS.
Next up we’ll adjust the parameters for our stream within OBS. For this guide we’ll be streaming using a resolution of 1080p and 160kbps audio. However, this might be demanding for your machine and network so please refer to the encoding recommendations provided by Twitch https://stream.twitch.tv/encoding/ in order to adjust the parameters accordingly.
Navigate to the Output section of the preference screen and make sure that Simple is selected as the Output Mode. We’ll use a Video Bitrate of 6000 kbps according to the recommendations. Leave the Encoder as Software (x264) and set the Audio Bitrate to 160. Also make sure to enable the Advanced Encoder Settings and Enforce streaming service bitrate limits and select veryfast as the Encoder Preset.

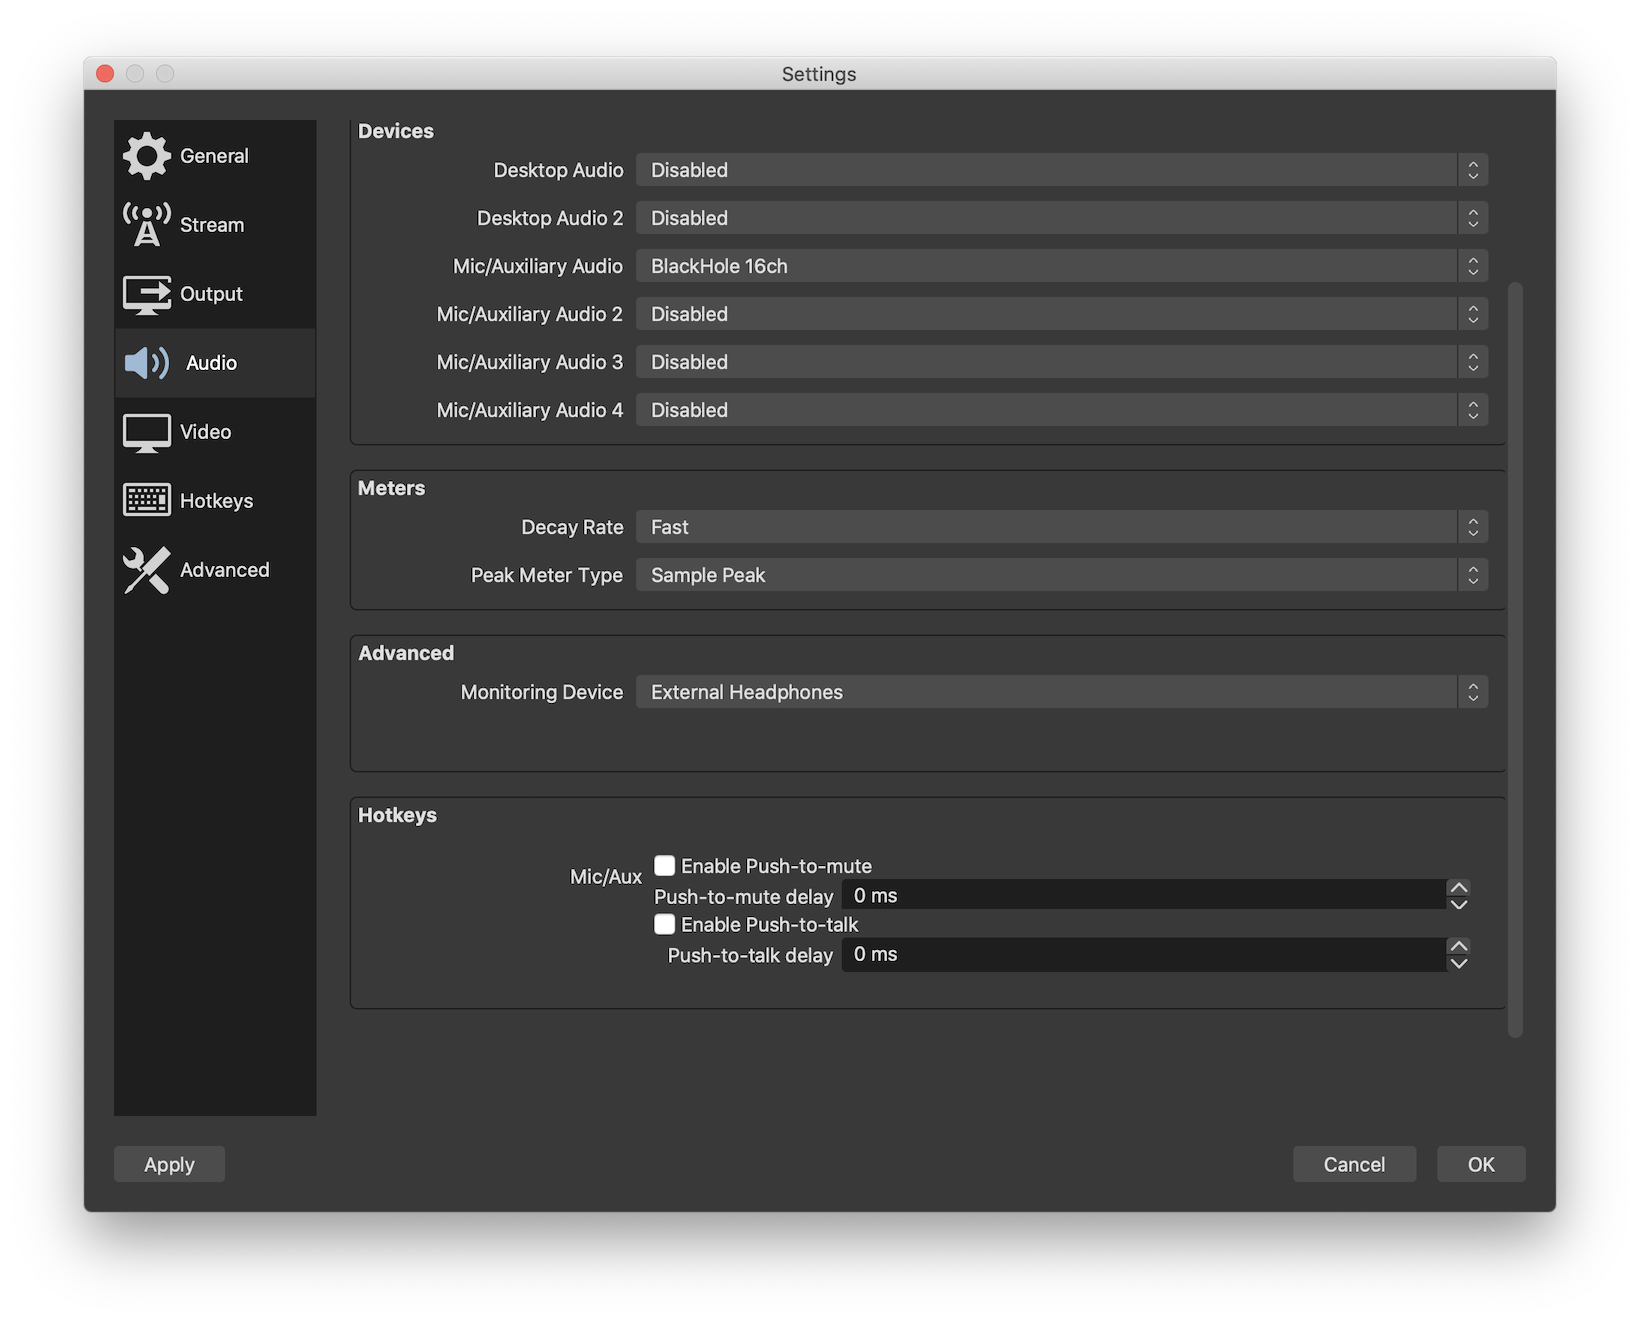
Next we’ll head to the Audio section to ensure that we are using a Sample Rate of 44.1 kHz to match our setting in Max and that we are streaming in stereo. Underneath this we can set up our Audio Devices. In order to route the output from Max into OBS we select BlackHole for Mic / Auxiliary Audio. If you’d like to additionally use a microphone input you can select this as the second device.

We’ll now head to the video settings and set our resolution. In order to stream with 1080p we set the Base and Output resolution to 1920x1080 and the Common FPS Value to 60.

With that, we have prepared OBS for our stream and can close the Preferences Window.
Selecting the Display Capture
At the bottom of OBS’ main window you can adjust the sources of video input that should be included in our stream. OBS is a powerful tool that allows you to combine various sources of video input into a single stream. For the sake of this guide we’ll stick to simply sharing the entire screen of the streaming computer, however feel free to adjust this according to the needs of your stream.
If there are already sources added to your stream simply remove them by selecting and clicking the Minus Button. To add a capture of your screen click on Plus Button in the Sources section and select Display Capture. Click OK in the opening dialogue and next up you will see a window that allows you to adjust the properties of the Display Capture. This would for example allow you to select the display to use in case you have multiple displays connected, hide the cursor or perform any cropping. You can simply click on Defaults in the bottom left corner and then click on OK. You should now see your display getting shown within OBS and can simply use the red border to resize the captured display to fit into the stream.
Starting the stream
To start our stream, click on Start Streaming in the bottom right corner of the OBS window. Once the stream is successfully connected and live you should see a bright green square on the bottom right corner.
You should now be able to access the Creator Dashboard on Twitch to verify your stream is up and running by visiting https://dashboard.twitch.tv/ and running with a good quality. From here you will also be able to interact with your viewers using the Live Chat. During your actual live stream it might be a good idea to turn off the local preview of your stream in order to save additional bandwidth.

Audio Monitoring
In order to be able to monitor the audio you will be streaming we need to ensure that OBS' monitoring is routed and setup correctly. First off open the Preferences again and switch to the Audio pane. In the Advanced section you can use the dropdown to select the Monitoring Device of your choice.

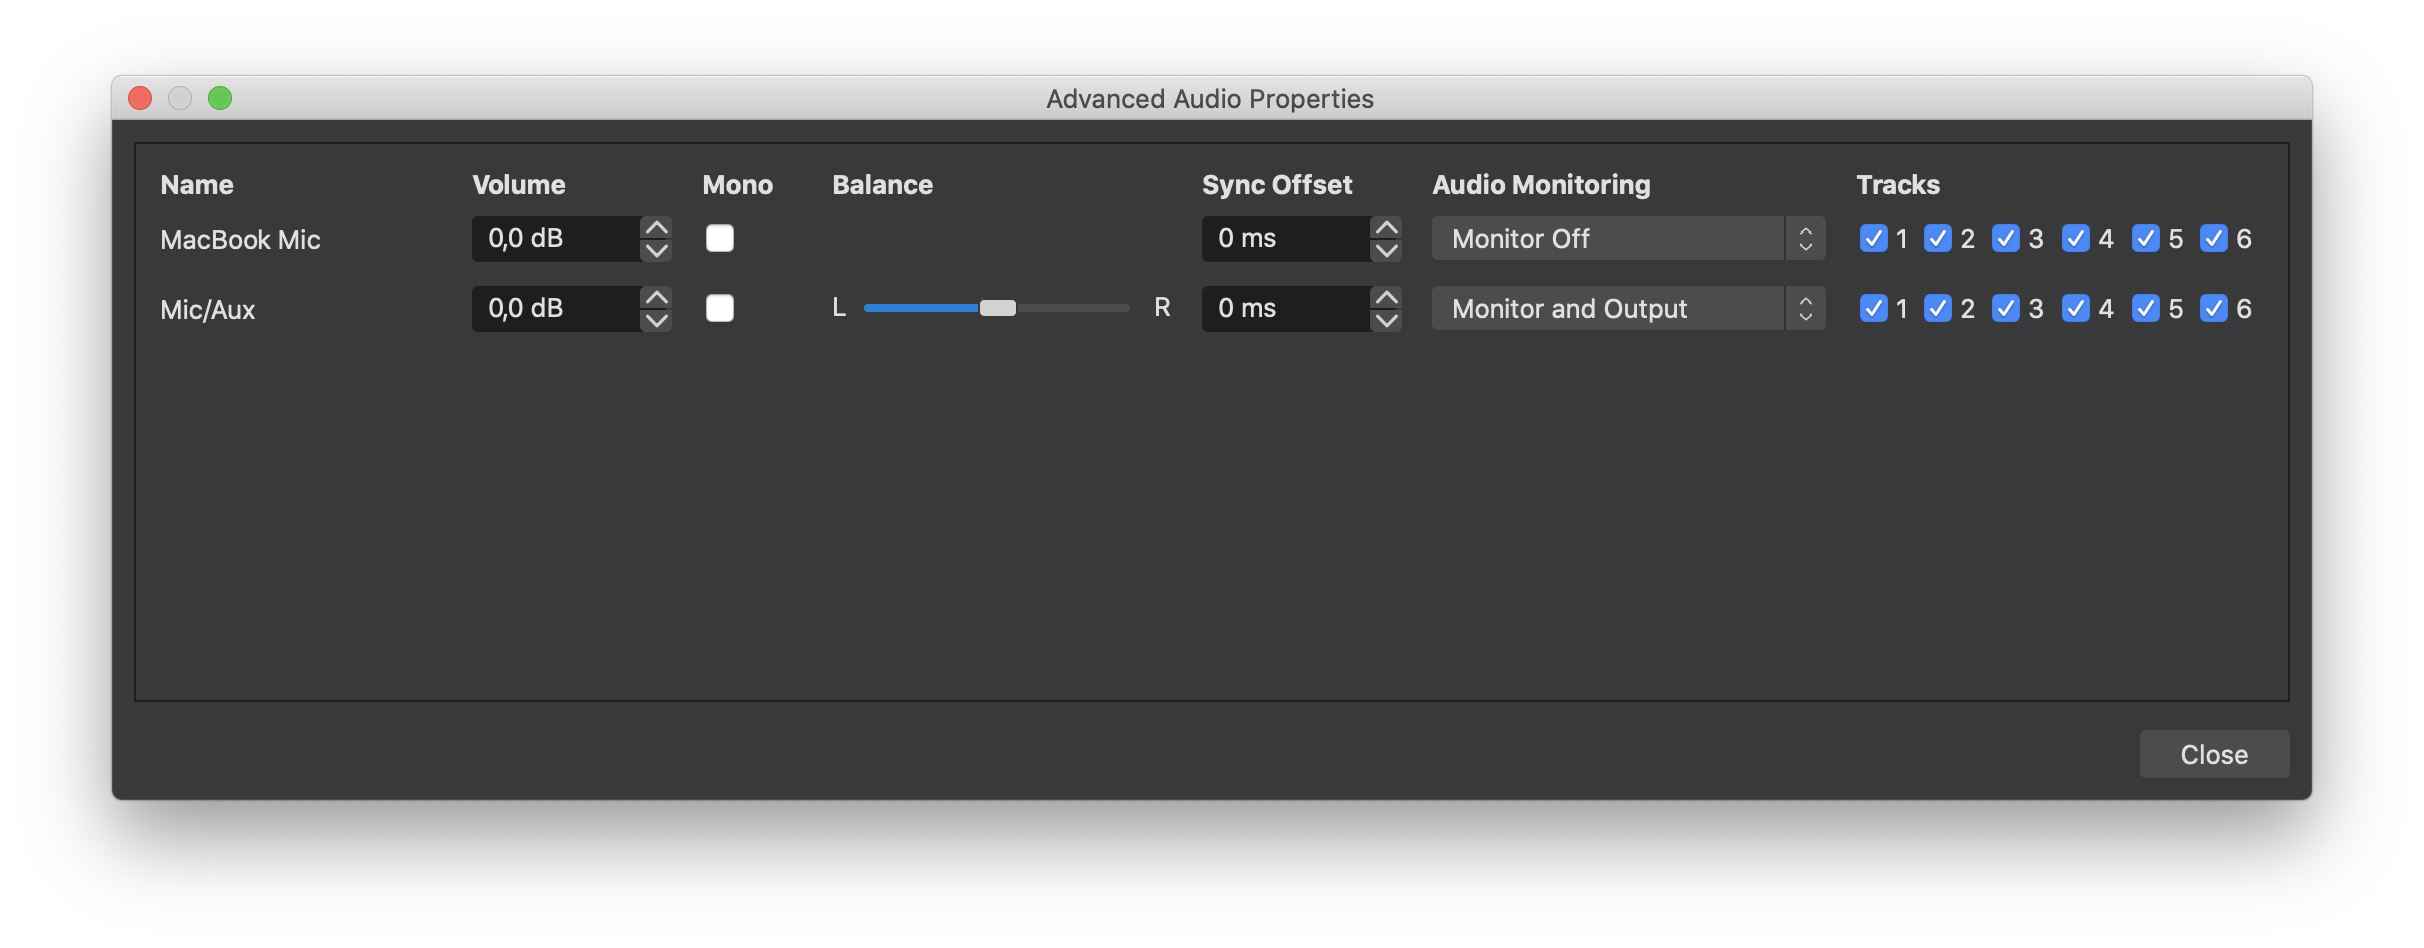
Next up we will need to enable the Monitoring for our stream. For that open OBS' Advanced Audio Properties via the Edit Menu and set the option for Audio Monitoring to Monitor and Output on the Mic/Aux device.

Issues to Consider
A fundamental limitation you will potentially encounter is the speed of your upstream connection. Most people have faster download than upload speeds. For example, an example cable modem speed test might say you have 130Mbps download and 12Mbps upload. Therefore it is recommended to test the speed of your connection before your are asking others to join your stream. You will end up having to adjust your video output settings accordingly. As a general help please refer to resources like Twitch’s Encoding Guidelines.
We chose to illustrate how to stream your Max patch using Twitch for this guide given the simplicity and accessibility of the service. However, if you have certain requirements like unlisted or private streaming you might want to consider using a different platform.
You can use OBS to route multiple audio sources into your stream but can of course also use an adc~ within your Max patch and combine it with the audio produced by your patch if that’s easier for your setup .
We hope this guide helps you get started using Max in a live streaming environment, and encourage you to leave a comment if you run into trouble or have any other tips you can offer.
by Florian Demmer on March 20, 2020

