The Compleat ROBO, Part 3: Recording Cleanup
Welcome to the third part of our tutorial on creating an automatic sampling system! This time out, we're going to clean up the process we've created to do our recording.
Overview
In the last outing from our holiday tutorial series we were able to create automated sample runs and get some nice recordings. But, alas, the results aren’t too spectacular: there is a gap at the front of the sound file, a long empty spot at the back of the sample, and no easy way to clean that up.
Or is there?
My first thoughts on the subject were to tighten up the recording process: to detect volume changes at note-on to clean up the front gap, and to add some detection logic on the back end of the file to decide when the note had faded into the noise floor. But along the way, I realized something important: this isn’t a real-time operation, so we don’t need to overwhelm ourselves with real-time processes. Instead, we can do some post-recording processing and come up with an easier-to-understand (and easier to develop) file ‘cleaner’!
Buffer Recording
If we are going to be doing processing of the sound, we don’t really want to record it to a file. Instead, we should be recording sound into an audio buffer that we can manipulate before we save it. This approach points us to the combo of the record~ and buffer~ objects. Here’s a basic replacement of the sfrecord~ functionality we added in last week’s tutorial (part 2):
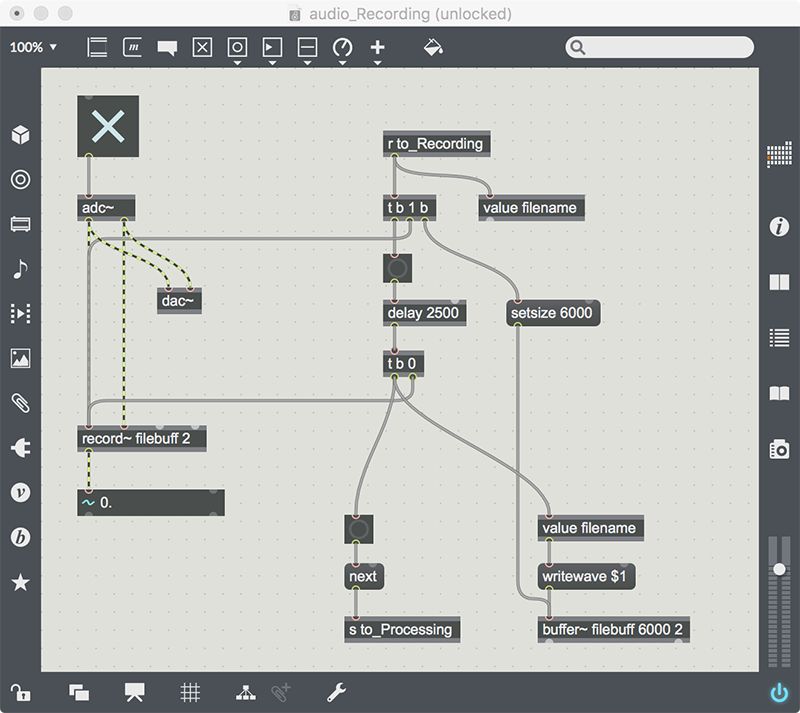
Since the order of operations is important, we use trigger objects to make sure things fire as they should. You’ll notice that our operation changes a bit - we start by clearing the buffer, and then we temporarily ‘stash’ the filename into a value object. This is important because we have to do the recording before we attempt to save it. Thus, when the end hits, we send a bang message to the value object to retrieve the filename.
If we try our recording now, everything should end up with the same (somewhat disappointing) results. Let’s make it better!
Buffer Hacking
Since we’ve already started using Javascript to make our app more functional, let’s continue down that path. One of the interesting little corners of the “Javascript In Max” document is the section on the Buffer Object - a Javascript object that gives you direct access to any buffer~ object in your patch!
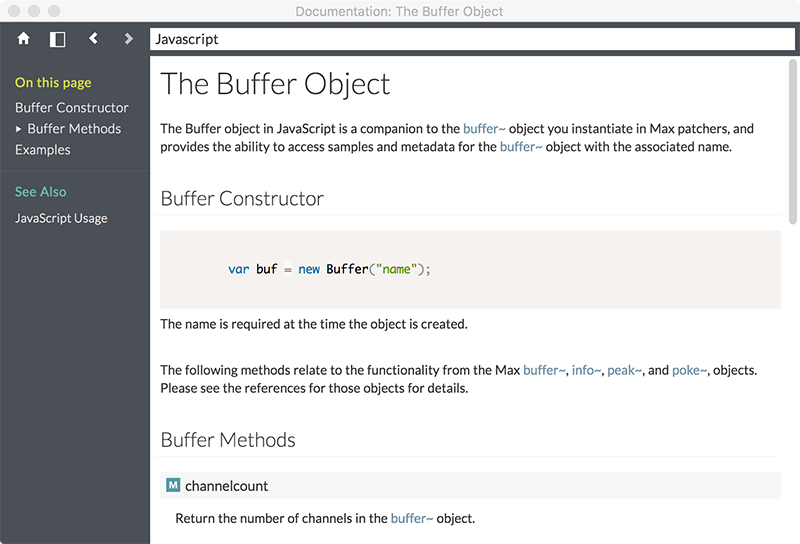
If we dive into it, there is only a little information - things like buffer length (in milliseconds), framecount (the number of samples per channel) and number of channels. But there are a few more tricky bits: the peek/poke combo, which allow us to get and update individual samples, and the send function, which lets us send buffer~ commands to the Buffer Object in our script. And we are going to use these to outright terrorize our recording buffer!
Let’s start by putting a new js object in the path of our processing. In this case, we are going to put it after the delay that finished up the recording; this will give a place to put a trigger object that will be the traffic cop for all of the operations to follow.
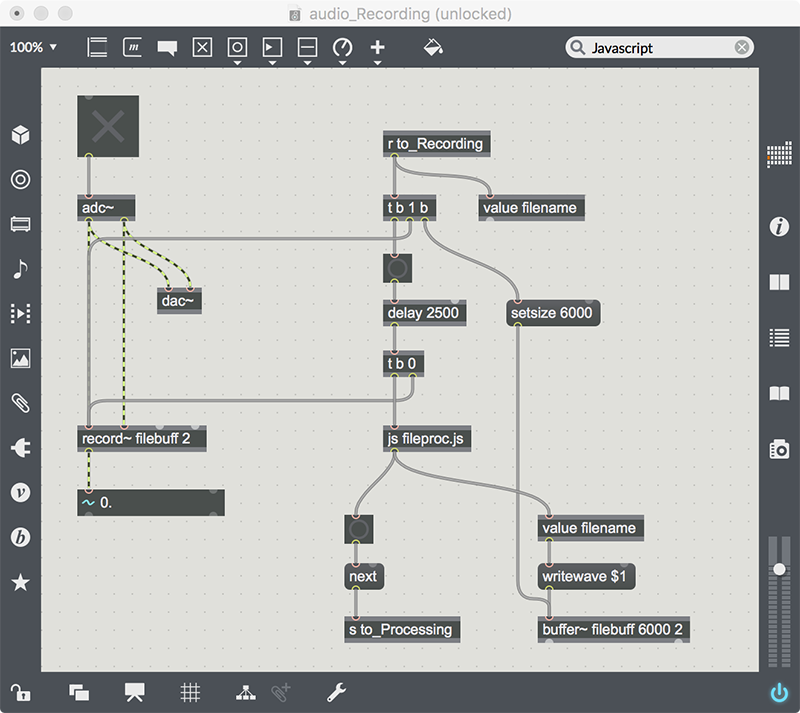
First, we stop the recording (by sending a 0 to the record~ object), then we tell the Javascript object to do its processing (by sending it a bang message). All of the processing from here is managed by the Javascript object; this allows us to finish our processing before we start the next note-on request.
Looking at the fileproc.js source code inside the js object shows a few things:
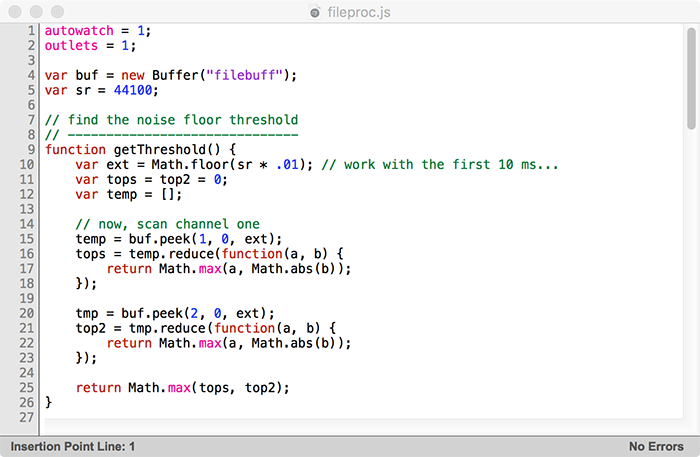
We have a few variables to hold the buffer reference, and to hold the sample rate (which could change in between calls). Next, we have a routine that is called, and checks the first 10 milliseconds for the highest value; that will be considered the noise floor for the recording.
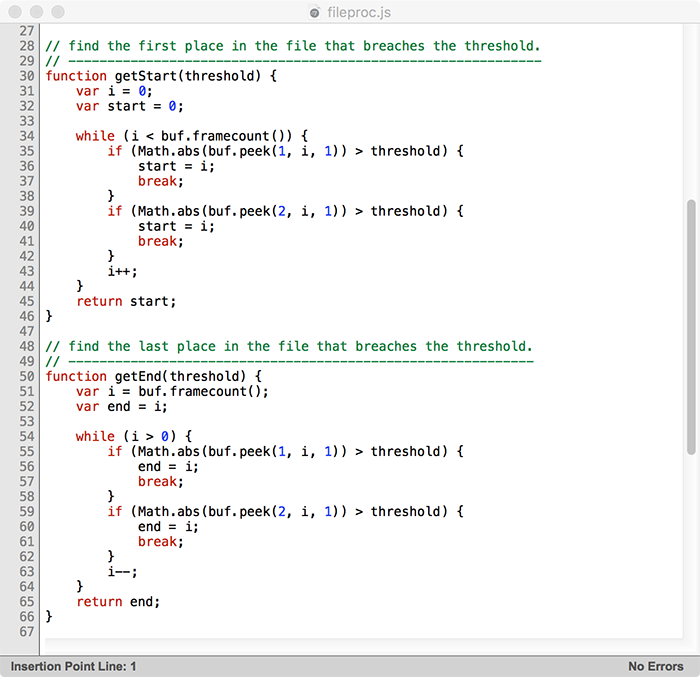
Next, we then have two routines: one that starts at the beginning and looks for the first sample larger than the noise floor, and one that starts at the end and looks for the last sample that is larger than the noise floor.
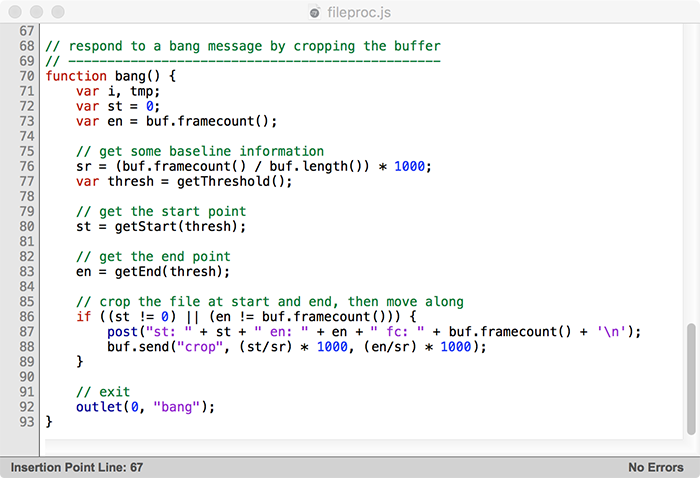
Finally, we set up a bang() function (one that will respond to a bang message…) that will verify the sample rate, get the threshold, and call the start and end points detectors. It then sends a ‘crop’ message to the buffer to trim the front and the back of the sample. Following that, it sends out a bang message - which allows our patch to continue.
A little more Detailing
If we run this code as-is, it all seems to working well - but the result is still a little unsatisfactory. The issue is that the end of the file cuts off unnaturally, and the chopped noise floor is not a great sound. So we can add one more routine to the file which does a linear fade-out at the end of the sample (and call it from within the bang() function). This will smooth out the endgame a little, and make a file that will be a lot nicer to use in a sampler.
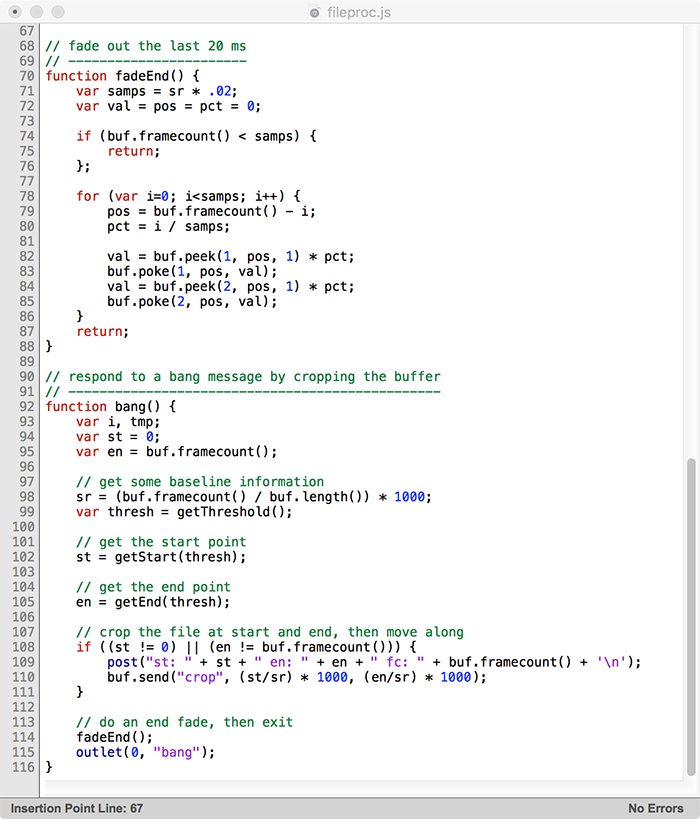
Now we are cooking, and after recording we have a file that’s a lot more conducive to using in a musical way:
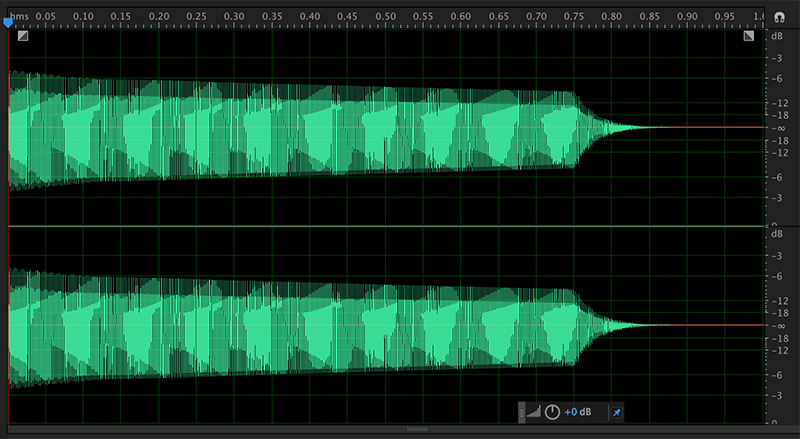
This time out, we’ve learned a little about buffer hacking with Javascript. We’ve also learned about how to sequence our processing functions correctly. If you are looking to extend the functionality of this project, you could change the fade-out to be more natural, centralize the note duration (which would include changing the recording time) or properly handle channel counts. But in any case, you should have the tools at hand to make some interesting sampling results.
Next week, when we will make what we've created into a sharable standalone application. In the meantime, here’s the full Javascript source as text. Enjoy!
[ddg]
autowatch = 1;
outlets = 1;

var buf = new Buffer("filebuff");
var sr = 44100;

// find the noise floor threshold
// ------------------------------
function getThreshold() {
    var ext = Math.floor(sr * .01);    // work with the first 10 ms...
    var tops = top2 = 0;
    var temp = [];

     // now, scan channel one
    temp = buf.peek(1, 0, ext);
    tops = temp.reduce(function(a, b) {
        return Math.max(a, Math.abs(b));
    });

     tmp = buf.peek(2, 0, ext);
    top2 = tmp.reduce(function(a, b) {
        return Math.max(a, Math.abs(b));
    });

     return Math.max(tops, top2);
}

// find the first place in the file that breaches the threshold.
// -------------------------------------------------------------
function getStart(threshold) {
    var i = 0;
    var start = 0;

     while (i < buf.framecount()) {
        if (Math.abs(buf.peek(1, i, 1)) > threshold) {
            start = i;
            break;
        }
        if (Math.abs(buf.peek(2, i, 1)) > threshold) {
            start = i;
            break;
        }
        i++;
    }
    return start;
}

// find the last place in the file that breaches the threshold.
// ------------------------------------------------------------
function getEnd(threshold) {
    var i = buf.framecount();
    var end = i;

    while (i > 0) {
        if (Math.abs(buf.peek(1, i, 1)) > threshold) {
            end = i;
            break;
        }
        if (Math.abs(buf.peek(2, i, 1)) > threshold) {
            end = i;
            break;
        }
        i--;
    }
    return end;
}

// fade out the last 20 ms
// -----------------------
function fadeEnd() {
    var samps = sr * .02;
    var val = pos = pct = 0;

     if (buf.framecount() < samps) {
        return;
    };

     for (var i=0; i<samps; i++) {
        pos = buf.framecount() - i;
        pct = i / samps;

         val = buf.peek(1, pos, 1) * pct;
        buf.poke(1, pos, val);
        val = buf.peek(2, pos, 1) * pct;
        buf.poke(2, pos, val);
    }
    return;
}

// respond to a bang message by cropping the buffer
// ------------------------------------------------
function bang() {
    var i, tmp;
    var st = 0;
    var en = buf.framecount();

    // get some baseline information
    sr = (buf.framecount() / buf.length()) * 1000;
    var thresh = getThreshold();

     // get the start point
    st = getStart(thresh);

    // get the end point
    en = getEnd(thresh);

     // crop the file at start and end, then move along
    if ((st != 0) || (en != buf.framecount())) {
        post("st: " + st + " en: " + en + " fc: " + buf.framecount() + '\n');
        buf.send("crop", (st/sr) * 1000, (en/sr) * 1000);
    }

     // do an end fade, then exit
    fadeEnd();
    outlet(0, "bang");
}
by Darwin Grosse on December 19, 2017

