
Extracting Motion from mostly still video like some guy on YouTube

Hi,
I'm inspired by this and similar videos by same author. The tutorial mostly covers implementing the "motion extraction" technique using DaVinci Resolve, and I successfully followed the steps using KDENLiVE, to a certain degree.
Now, I'm trying to duplicate and/or expand on the technique using Jitter, but I'm having trouble with the last couple of steps, "color correction" and "playful recombination" or whatever.
By default this example patch opens "broken" right where I'm stuck, but if you send the "drawto world" message to the videoplanes, the "extracted motion" from the chickens clip will appear in the jit.world window. It's working correctly when you see almost all of the pixels in jit.world window colored middle grey (because top layer shader does "color inversion and 50% opaque alpha" ), so only the pixels portraying motion pop out of the grey field (because top layer is also delayed by 5 frames)
I think what I need to do next is recombine the videoplane texture data into a single jit.gl.slab (or what?) before the texture data goes to jit.world and then write a slab-shader that can identify those grey pixels, substitute different colors, and or make them 0% opaque, say. But I'm not sure that should work and haven't successfully implemented the slab idea or stumbled on anything else that works. Any thoughts, suggestions, or ideas?

Please use the @embed atttribute on your jit.gl.shader so you can share the actual shader within the patch.
Also, not sure why you need a custom jxs shader for color inversion, it can be done very easily in [jit.gl.pix]. In my example I did it that way to replace your missing shader, and I've set the *0.5 on alpha channel here too.
Also, your @drawto attributes need to be set to an existing rendering context, which is given either by a [jit.world] or [jit.gl.node], not a [jit.gl.slab].
Here's my attempt at recreating the effect from your tutorial:
Awesome. Thank you!
I know there are many ways to do many things in Max, I used a custom shader because I knew how. (except for embedding it to share, sorry) I only added one line.
color = vec4(1-color.r, 1.color.g, 1-color.b, 0.5);
Now I see how the same thing can be done using the jit.gl.pix object. Thanks again. I'm learning slowly, with lots of help...
My bad, if you're more comfortable with GLSL, then go on! For sure it will give you more flexibility.
In your case, I would use [jit.gl.slab] instead of [jit.gl.shader] because it's kind of easier to get multiple textures into it, and you can throw it in the middle of any texture cord (in mean the blue wires in Max) while the jit.gl.shader needs to be applied to an existing object, but it's mostly a question of preference at this point.
It is very possible to simplify my example by putting most of the processing in just one jit.gl.pix/slab/shader, no need to have these jit.gl.layer captured by a jit.gl.node in-between. I did so just to get a clearer view of the different processing steps, and to benefit from the blend modes of jit.gl.layer and set it to 'screen', but I could have programmed that 'screen' compositing just like I did the alphablend one in the first jit.gl.pix for example.
By the way, you can mimic these blend attributes of jit.gl.videoplane/layer/mesh/model... with the jit.fx.co.* objects. For example for the screen blend mode, you can create a [jit.fx.co.screen], and double-click on it to get the code that you can then add in your own pix/slab/shader.

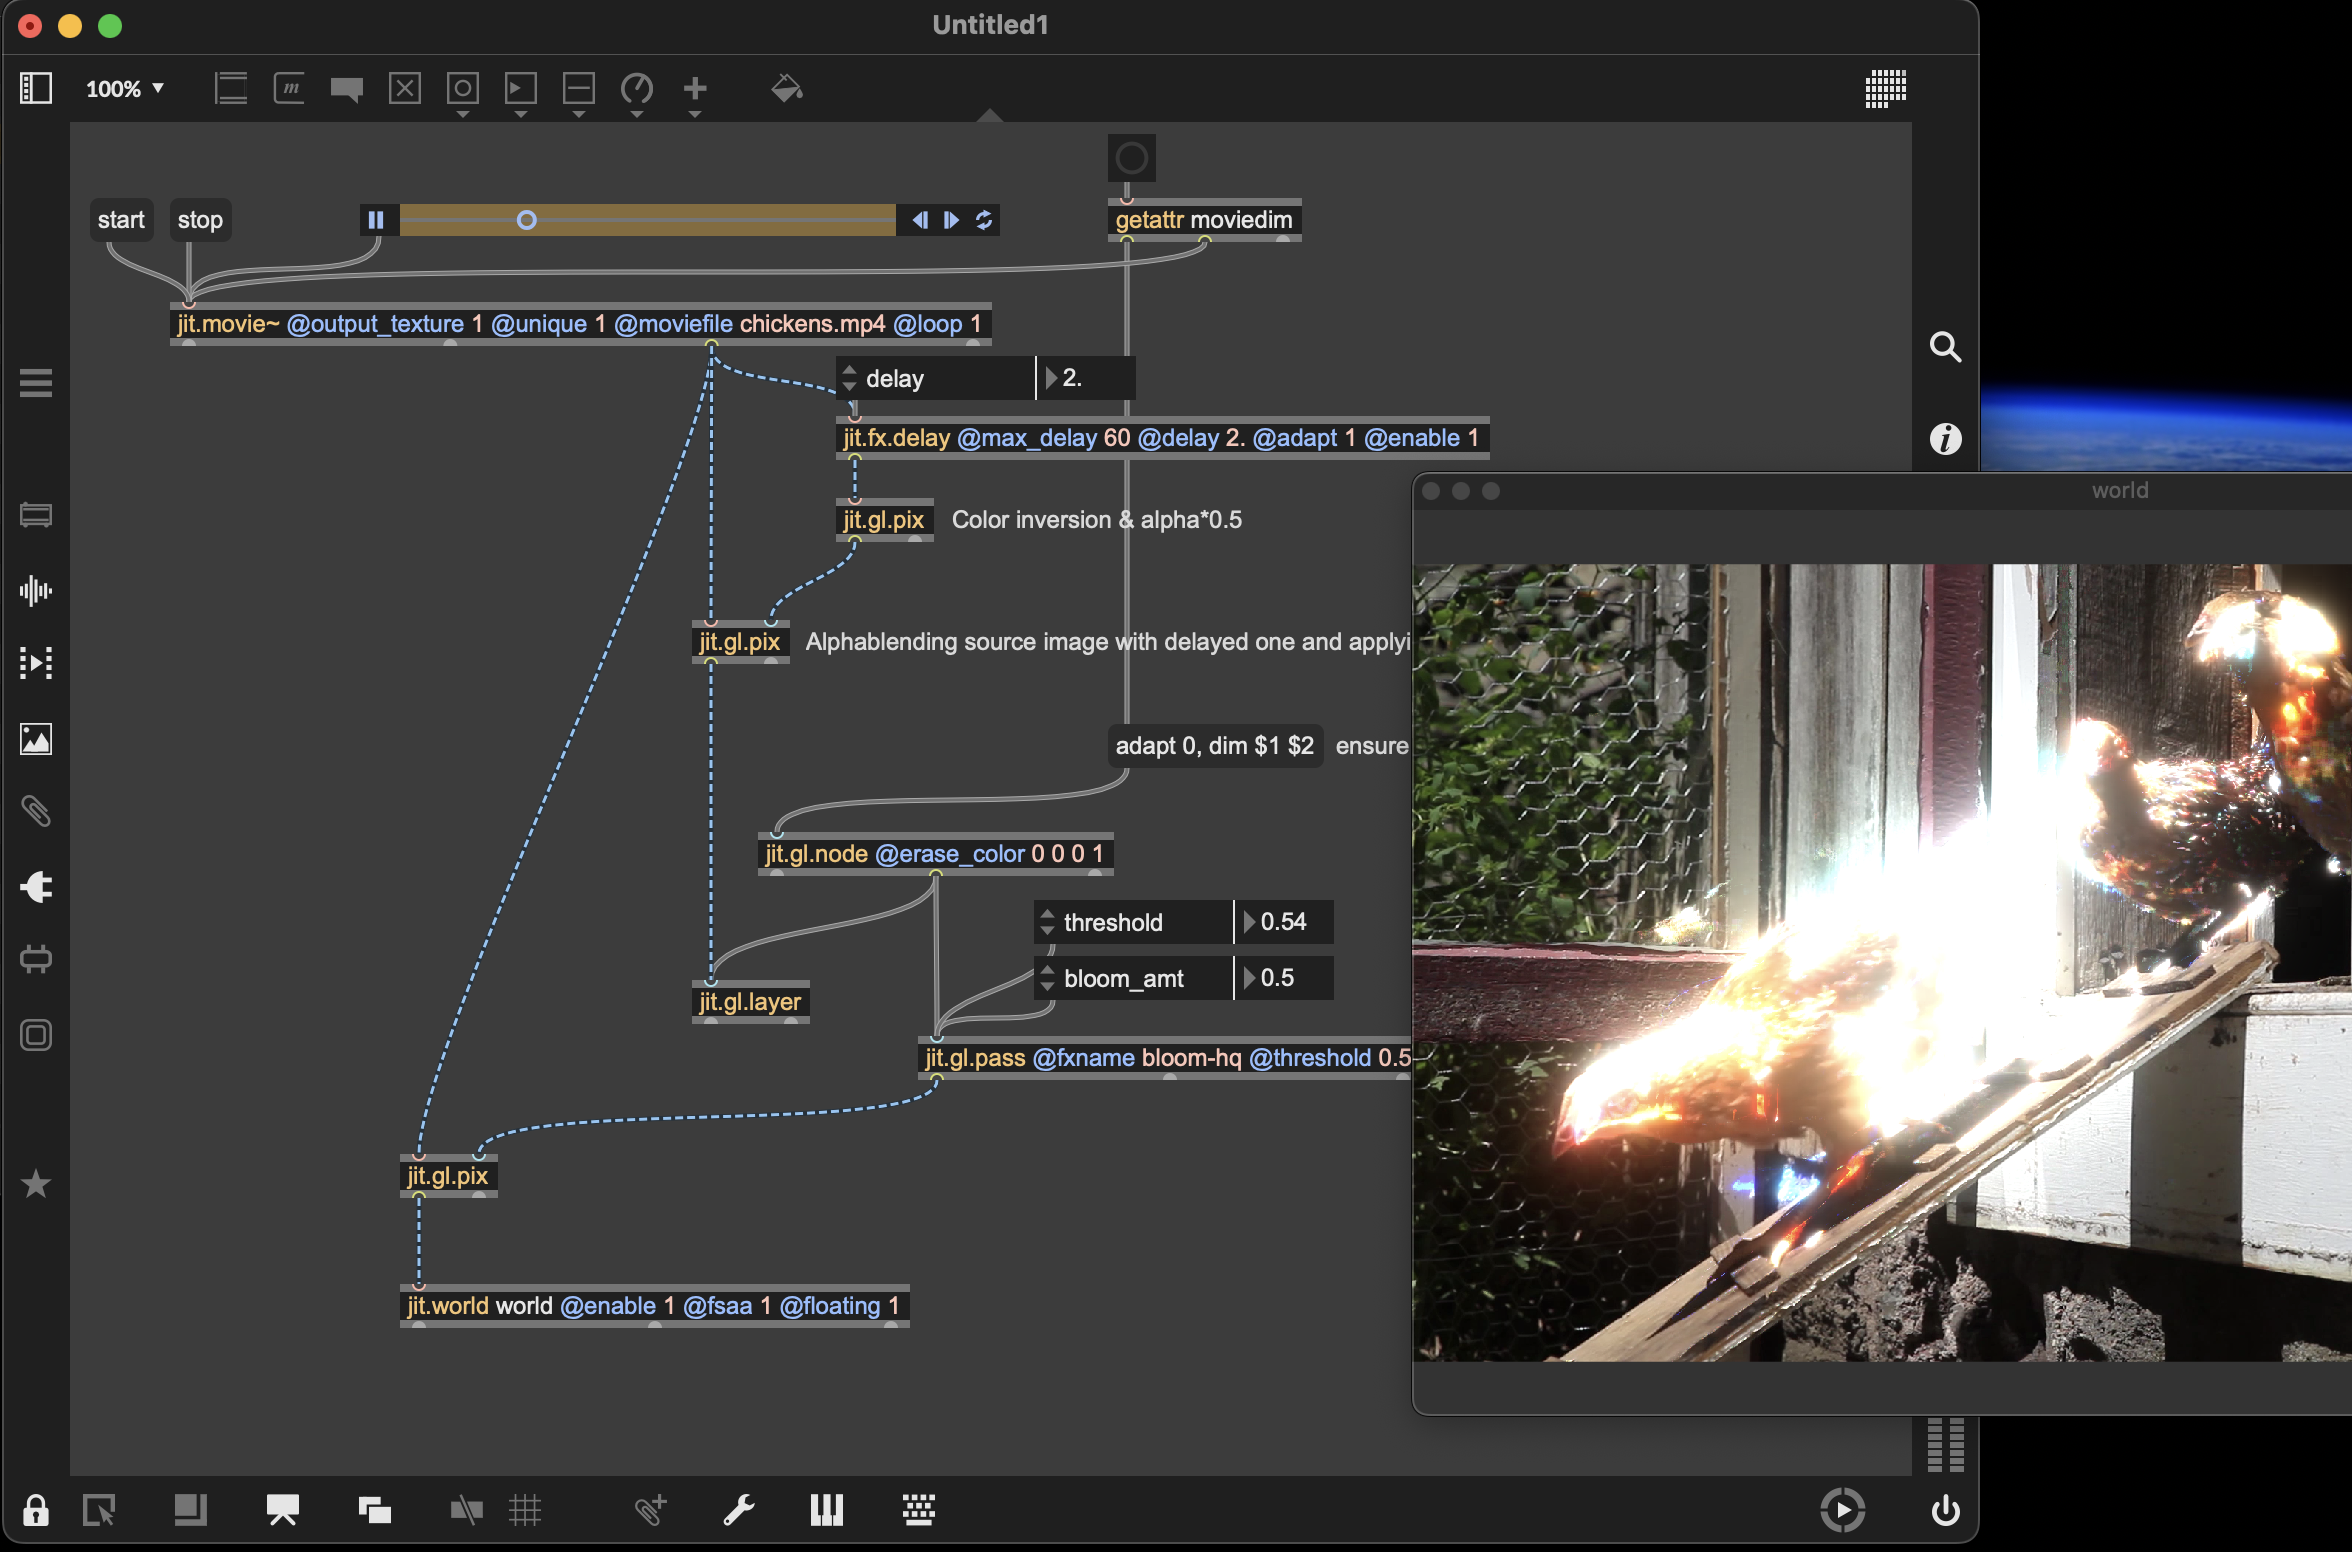
cool effect! Here's my take on TFL's that uses a jit.gl.pass @fxname bloom-hq for the glow effect. It's somewhat simplified, but requires adapting the pass effect node dimensions to the input source to ensure proper compositing.
Belated thanks Rob and thanks again TFL,
I recently tried to use this cool motion extraction effect in a M4L context and was hit in the nose by the fact that the Max version bundled with Live 12.1.11 is still Max 8, so this solution needed (temporary) adaptation for Max versions before 9. I found another Rob Ramirez forum response from 2019(?) helping someone with a webcam stream delay and combined that example with Rob's example above to make this 12.1.11 M4L "A/V instrument" device. (copy-compressed from an M4L "audio effect" device , but the "plugin~" signal isn't used or passed)
(an .amxd patch was "copy compressed", save-as .amxd (M4L device) after using "new from clipboard" here?)