
The Compleat ROBO, Part 4: Cleanup and Standalone
In this last entry in our ROBO sampler build-out, we are going to do a little house-keeping. We are going to start off by tightening up the patch organization, clean up the UI, then get the whole thing running as a standalone application.
Cleaning House
We're almost there, but there's a bit more house-keeping to do. Let's get started by tightening up the organization of our patch.
Abstractions All Around!
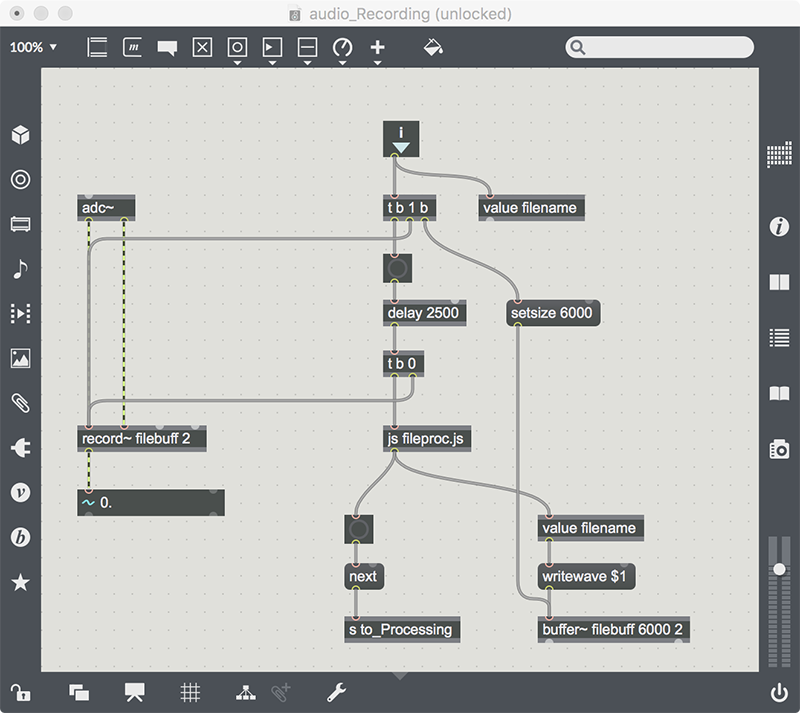
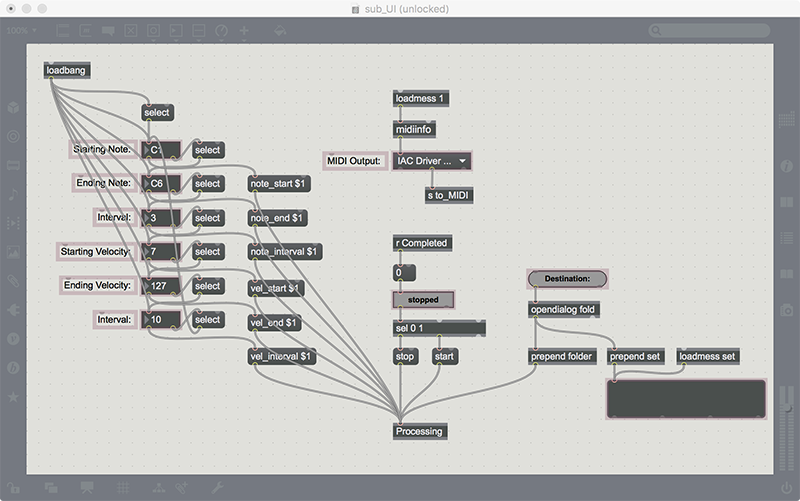
Let’s start by working with abstractions. An abstraction is a way to make something that looks like a Max object, but made from Max (instead of C code). Let’s start by adjusting the audio_Recording patch. Since we don’t have any patchcord dependencies, we could use it as-is, but in order to control the dataflow, I’m going to add one inlet, and replace the to_Recording send operation with that inlet. I’m also going to handle the monitoring and audio switching elsewhere, so I’ll remove it from this patch:
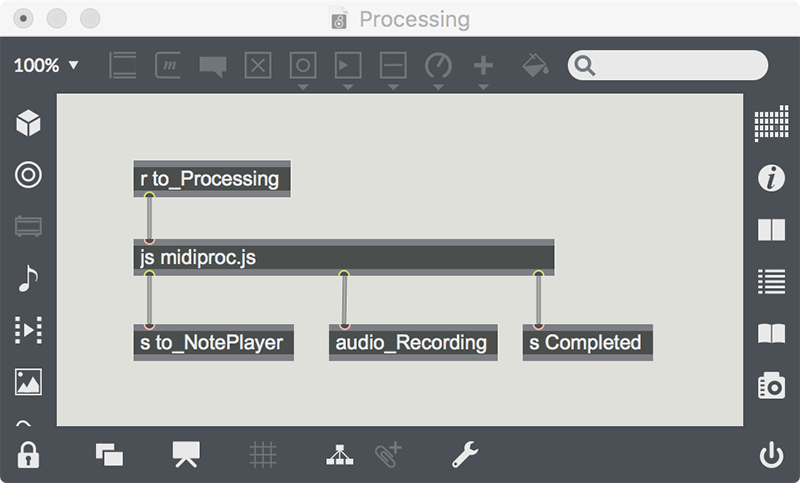
Now we can replace the to_Recording sender in the Processing patch with a direct call into audio_Recording:
If you double-click on the audio_Recording ‘object’, you’ll see that it is just our project’s patch, embedded into the Processing patch as if it were a standard Max object.
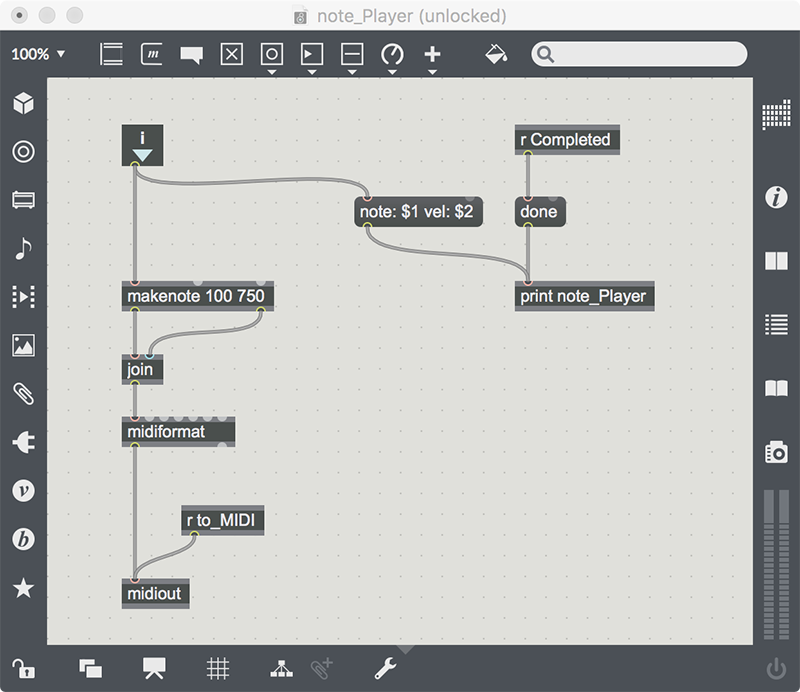
Next, we’ll make the note_Player patch also work as an abstraction:
And we'll also install that as an ‘object’ in the Processing patch:

Finally, we’ll make an abstraction out of the Processing patch itself, but we’ll leave in the to_Processing receiver, since our subpatches depend on it for communications:
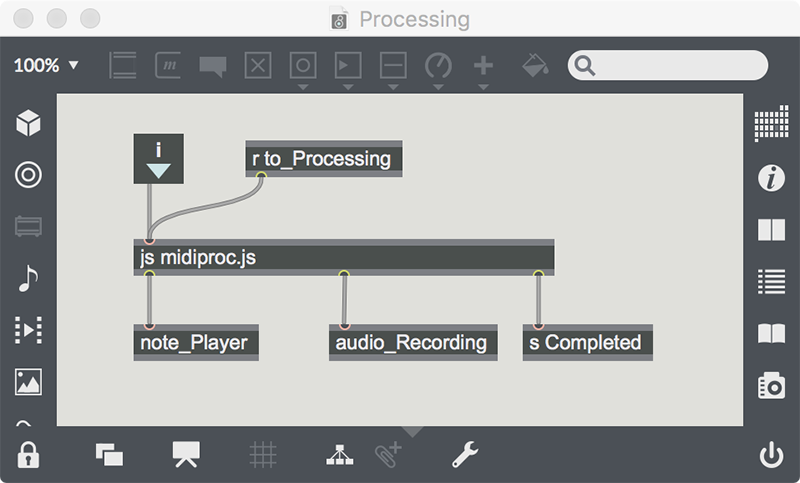
We can then embed the Processing patch into the sub_UI patch, replacing the to_Processing sender:
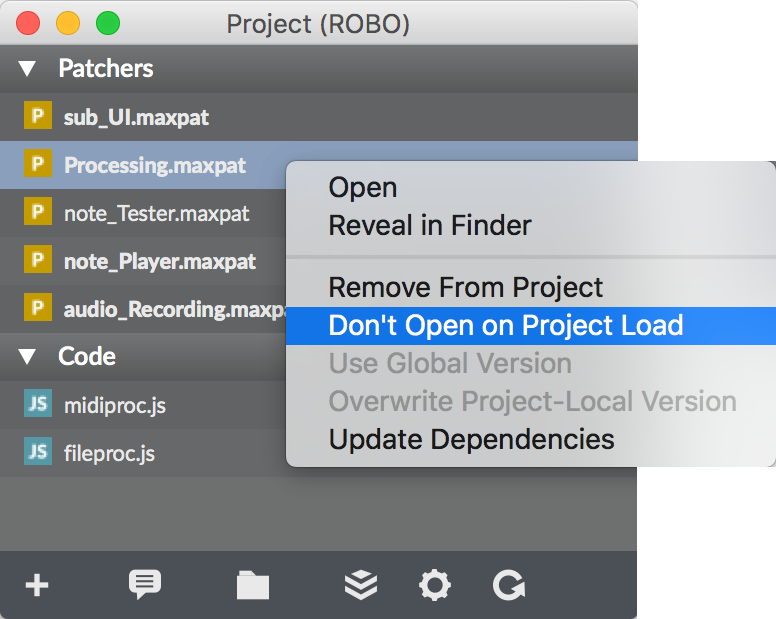
Now that we are using abstractions, the subpatchers no longer need to open on startup - so we should change that in the Project window:
If you are patching along, now is a good time to test your work with a sampling run!
Upping the UI Game
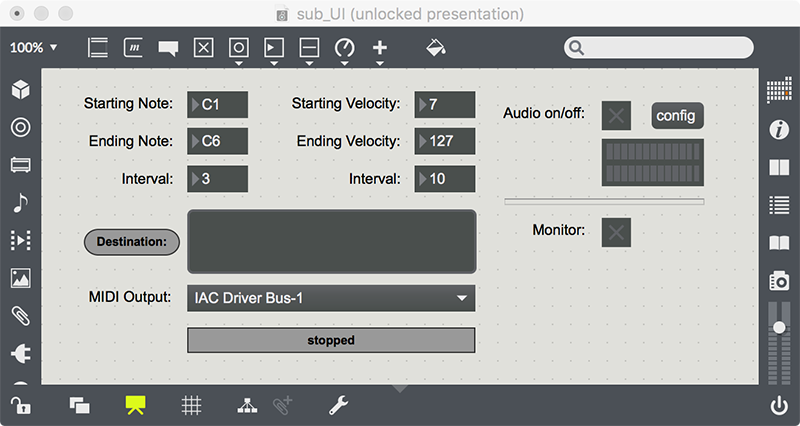
At this point, we can run our patch with only the UI patch displayed (and in Presentation Mode). But there’s one thing still to do - make sure that we have all of our UI moved to this top level and available without having access to the Max environment. We already chopped some user interface elements from the audio_Recording patch; let’s add those options to our UI patch, but do it ‘with steroids’:

We are doing a few things in this code snippet: first, we are exposing the adc~ and dac~ objects at the top level: turning them on and off here will do so for every subpatcher and abstraction in the project. Secondly, we have a ‘Monitor’ switch that allows us to monitor the input to the output; this is useful if we are recording virtual instruments or audio we are capturing with Loopback or Soundflower. Finally, I added some meters for visualizing the incoming signal, and a ‘config’ button that just fires off an open message to the audio system to open the Audio Configuration window.
When I shuffle this bit of code around, here's what the resulting user interface looks like:
I now have the ROBO sampler I’ve been wanting, and a lot of ways to tweak it if I need to. Now, let’s set it up to share...
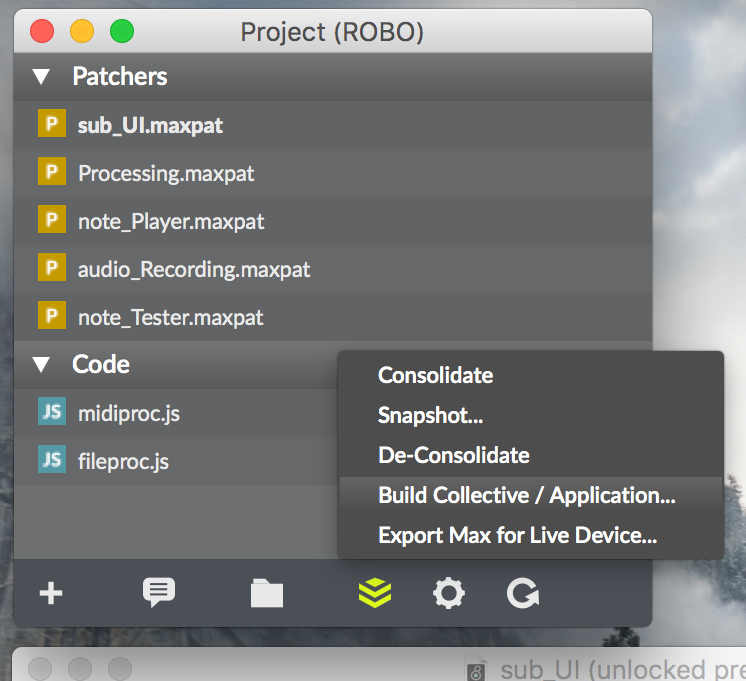
Building a Standalone
I love standalone apps. I love being able to make something and having it available to everyone for sharing. It used to be that making a standalone app required a lot of steps and details, but making this out of project eases our efforts a little. If we take a look at the video Tim Place created, we’ll see that a click on our project’s window and we have a standalone in the making:
If we take this for a ride, we’ll see that things work just like it did in our in-Max version. A couple of differences: there is no ‘frame’ around the app, and the menu is application specific. Another cool thing: if we click on that ‘config’ button, the Max Audio Status window appears, and gives us all the routing and setup functions we need to support our sampling process. There is plenty more we could do with this - we could tweak the menu, change the window header and other goodies, but this gives us the tools to get the job done - and to share it with our friends.
I hope you’ve enjoyed this series. Have a great holiday season, and we’ll catch you with more patching action in 2018!
[ddg]
by Darwin Grosse on December 27, 2017


